Learn Access Now! Chapter 18 Previous Section in Chapter 19 Next Section in Chapter 19 Chapter 20
Chapter 19: Working with Dialog Boxes and Menus
(This is section 2 of 3 in this chapter)
Adding Menus
As you start to develop a series of forms for a particular database, you might want to create some method to display them in an organized manner. You probably have a good idea of how to use your forms and how to access them from the Database window. However, others who use your database may not have your Access knowledge. One answer to this problem is to develop menus from which any user can make choices.
There are two types of menu systems you can devise in Access:
- Switchboard menus
- Custom menus
The following two sections cover these two menu types.
Developing Switchboard Menus
A switchboard menu is a series of forms you develop that only call other forms. For instance, you might have a form named Startup which has nothing to do with any tables in your database. Instead, the form simply presents a series of command buttons, each of which leads to another form or report. In other words, the menu acts much like a switchboard operator, connecting you to the form you desire. As an example, assume you want to develop a switchboard menu for the My Friends database. In this case, your switchboard menu should contain four choices:
- Add records
- Review records
- Print records
- Exit
To build your switchboard menu, simply create a new form called Startup. This form doesn't have to be particularly large, but you want it big enough to contain a graphic and the four buttons. You will tie each of the buttons to a macro that accomplishes the desired action.
The Startup form looks like what is shown in Figure 19-5. Notice that the Startup form displays no database records; the only thing this switchboard menu does is provide users with a way to access the features you have programmed (via macros) into the database.
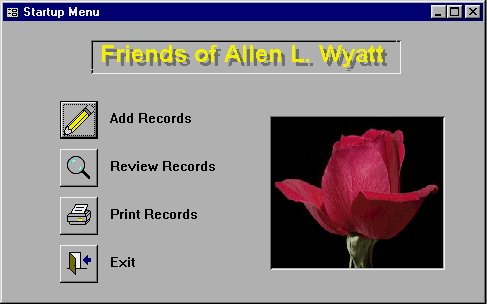
Figure 19-5 The Startup form.
In earlier chapters, you examined each of the techniques you need to create the Startup form. You learned how to create forms and change form properties in Chapter 9, "Creating Custom Forms." In Chapter 17, "Using OLE," you learned how to use OLE objects with databases and forms. In Chapter 18, "Creating and Using Macros," you learned how to tie macros to a form command button. The following sections describe what happens when you click your mouse on the various command buttons on this switchboard menu.
Note: The Startup form and the other macros and forms required to use it are contained on the companion CD-ROM in the Friends 6.mdb database. You should copy the file to a directory on your hard drive and rename it My Friends.mdb.
Add Records
When you click your mouse on the form's Add Records command button, the form runs the Add New Record macro. You created this macro in Chapter 18. As you will recall, the macro displays the Review Friends form, positioning the record counter at the point where you can add a new record, as shown in Figure 19-6.
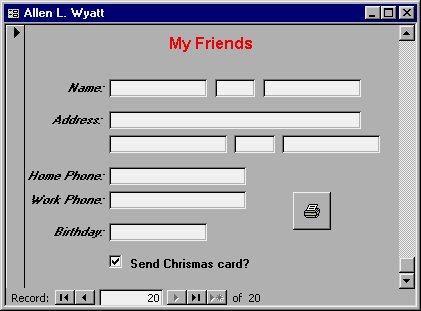
Figure 19-6 Adding a new record.
Review Records
Click your mouse on the switchboard form's Review Records button. The form, in turn, will call up a new macro, Review Records. This macro consists of a single action: OpenForm. Figure 19-7 shows the Macro window, with the arguments for the OpenForm action.
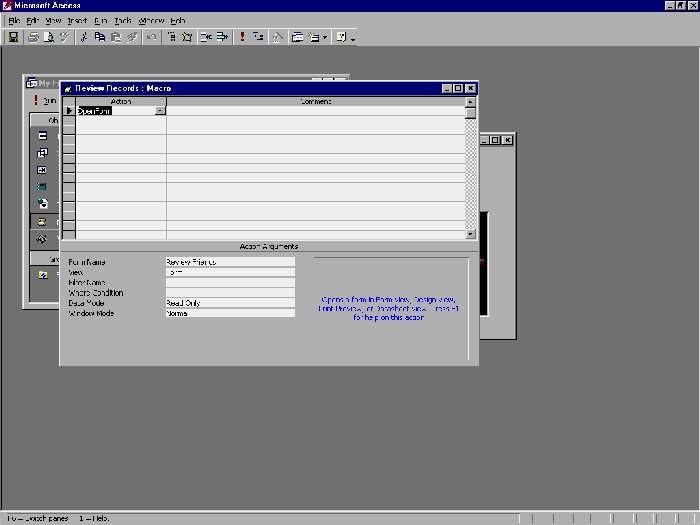
Figure 19-7 The single action used in the Review Records macro.
By setting the Data Mode argument to Read Only, you stop users from editing the data in the table. This lets them browse through the records, but stops them from making changes. If the user wants to make changes, they can use the Add Records option. The Add Records macro opens the same form (Review Friends) with the Data Mode argument set to Edit.
Print Records
In Chapter 18, "Creating and Using Macros," you developed the Print Report macro. This switchboard menu ties the Print Report macro to the Print Records command button. The Print Report macro prints all the records in the table in alphabetical order. When you click your mouse on this button, you will simply see the notice that the report is printing. When the macro is done, Access displays the switchboard menu, where you can choose another option.
Exit
When you click your mouse on this option, the switchboard menu calls a single-line Exit macro which contains a single Close action. When you execute the Exit macro, it closes the current object (which happens to be the Startup form), which, in turn, effectively ends the program.
Adding Custom Menus
With a simple application, such as the My Friends database, using a switchboard design is simple and straight-forward. As your database increases in complexity, however, the switchboard approach develops a few drawbacks. The main disadvantage is that users can quickly become lost in a maze of forms, buttons, and choices. Luckily, Access provides another alternative, custom menus. You can design your own menu system to either augment or replace the built-in Access menus. Custom menus offer an easy method to view multiple options at a single glance. Also, custom menus present options in a way familiar to those users comfortable with the Windows environment.
Understanding How to Customize Menus
You customize menus in Access using very intuitive techniques. All you need to do is choose the Customize option from the Tools menu. Access displays the Customize dialog box, as shown in Figure 19-8.

Figure 19-8 The Customize dialog box.
You can actually use the Customize dialog box to change just about every aspect of Access that you can see. To change menus, however, all you need to do is start working with the actual menus, while the Customize dialog box is displayed.
This is easiest to understand through an example. Let's say you want to change the order in which some options appear on a menu--you may want to change the Relationships option on the Tools menu so that it appears higher on the menu. To do this, simply click your mouse on the Tools menu. The entire menu should appear, as shown in Figure 19-9.
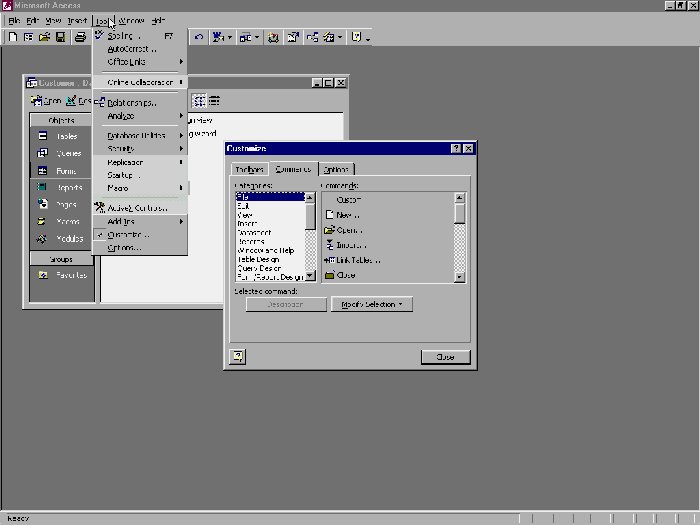
Figure 19-9 The Tools menu during customizing.
All you need to do in order to reposition the Relationships option is to click your mouse on it and drag it to a new position on the menu. When you release the mouse button, the menu option stays where you dropped it.
This on-screen customizing technique is very powerful, and you can do other customizing tasks, as well. For instance, if you drag an existing menu choice off a menu, it is deleted. If you want to rename a menu item, simply right-click your mouse on the option. The result is a Context menu, as shown in Figure 19-10.

Figure 19-10 A Context menu is used to display customizing options for an existing menu item.
If you change the setting in the Name field on the Context menu, the name of the menu item is changed. Notice that the existing menu name (&Relationships...) has an ampersand (&) at the beginning of it. This ampersand is the way you denote which letter is underlined in the menu option (the "R" is underlined in Relationships), and which key is therefore the hot key used to select the option from the keyboard. You can place a single ampersand before any letter you want in your menu name.
If you look again at Figure 19-10, you will notice that the Context menu presents quite a few other customization actions you can use, if desired. If you like, you can experiment with these to see their affect on your menus.
When you are done with your customizations, simply close the Customize dialog box. The changes you made remain persistent until you either change the menus again or reset them to their default.
Restoring Menus to Their Default
At some point you may wish to undo the changes you have made to a menu. Fortunately, Access provides a very quick way you can do this. With the Customize dialog box displayed, all you need to do is right-click your mouse on a menu. Make sure you right-click your mouse on the menu itself, not on an item in the menu. For instance, if you wanted to reset the Tools menu to its default condition, you would right-click your mouse on the Tools option on the toolbar. Access displays a Context menu with options you can use in customizing the menu.
With the Context menu displayed, all you need to do is choose the Reset option. (It is the first option on the menu.) Access closes the Context menu and the Tools menu, and everything is reset to normal. In this case, "normal" means that the Tools menu will look just like it did when Access was first installed.
Creating a Custom Menu System
Access gives you complete control over the menus displayed when you are using your own forms and dialog box. The first step, however, is that you need to create the actual menus that will be used. For example, let's assume you want to create a new menu system that is displayed whenever someone has the New Account Setup form open in the Customer database. (You will, of course, need to close the My Friends database and open the Customers database.) The way that you create a menu system is a bit awkward and non-intuitive in Access. To create such a menu system, follow these steps:
- Choose Customize from the Tools menu. Access displays the Customize dialog box.
- Make sure the Toolbars tab is selected. (I know it sounds strange to use toolbars to create menus, but that is the way Microsoft set it up.)
- Click your mouse on the New button. Access displays the New Toolbar dialog box, as shown in Figure 19-11.
- In the Toolbar Name field, enter the name you want to use for your menu. For this example, enter a name of New Accounts Menu.
- Click your mouse on the OK button. Access adds the new toolbar/menu to the list of toolbars, and displays an empty toolbar beside the Customize dialog box.
- Click your mouse on the Properties button in the Customize dialog box. Access displays the Toolbar Properties dialog box, as shown in Figure 19-12.
- Change the Type pull-down list so the Menu Bar option is selected.
- Click your mouse on the Close button. Access closes the Toolbar Properties dialog box and again displays the Customize dialog box.
- Click your mouse on the Commands tab in the Customize dialog box.
- In the list of Categories, select New Menu. Access displays a single option (New Menu) at the right side of the dialog box, in the Commands list.
- Use the mouse to drag the New Menu option from the Commands list to your blank menu bar. The words "New Menu" should now appear on your menu bar.
- Right-click your mouse on the New Menu option on your menu bar. Access displays a Context menu.
- In the Context menu, change the Name to &File.
- In the Categories list on the Customize dialog box, select the All Macros option. The only thing that should appear in the Commands list is the Display Ancillary macro, as shown in Figure 19-13.
- Use the mouse to drag the Display Ancillary option from the Commands list to the new File menu you created on your menu bar.
- Drag your new menu bar so it is located just below the regular Access menu bar and just above the toolbar, at the top of the program window.
- Click your mouse on the Toolbars tab in the Customize dialog box.
- Make sure the check box beside the New Accounts Menu option is cleared. Access removes the new menu on which you have been working.
- Click your mouse on Close. Access closes the Customize dialog box.
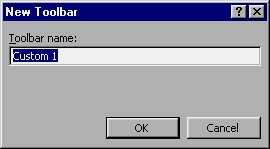
Figure 19-11 The New Toolbar dialog box.
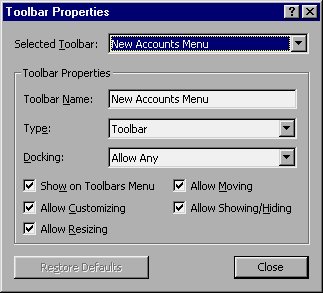
Figure 19-12 The Toolbar Properties dialog box.
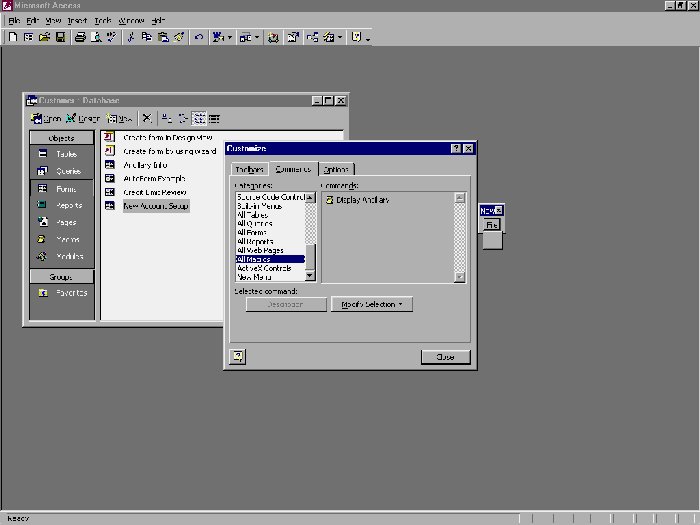
Figure 19-13 Creating a new menu command.
In this example, you created just a single menu and a single option on that menu. Your menus can be as complex or as simple as you desired. This very simple menu system is more than acceptable to show how Access treats your custom menus.
Using Custom Menus
After you define a custom menu system, you can use it with specific forms or reports in your system. To do so, you need to set the Menu Bar property for the form or report. To continue the example begun in the last section, assume you want to use your new custom menu system with the New Account Setup form you created earlier in the book for the Customer.mdb database. To do so, follow these steps:
- Display the Design window for the New Account Setup form.
- Display the Properties dialog box for your form. Make sure the Other tab is selected, as shown in Figure 19-14.
- Select the Menu Bar property.
- Click your mouse on the pull-down arrow to the right of the Menu Bar property box.
- Select the New Accounts Menu option. This is the menu bar you created in the previous section.
- Close and save your form.
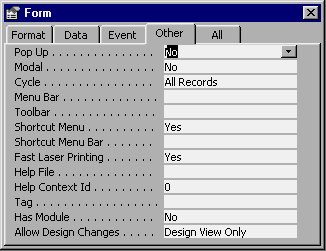
Figure 19-14 The form Properties dialog box.
That's all there is to it. The next time you open this form, Access will automatically load and use the custom menu, as shown in Figure 19-15.
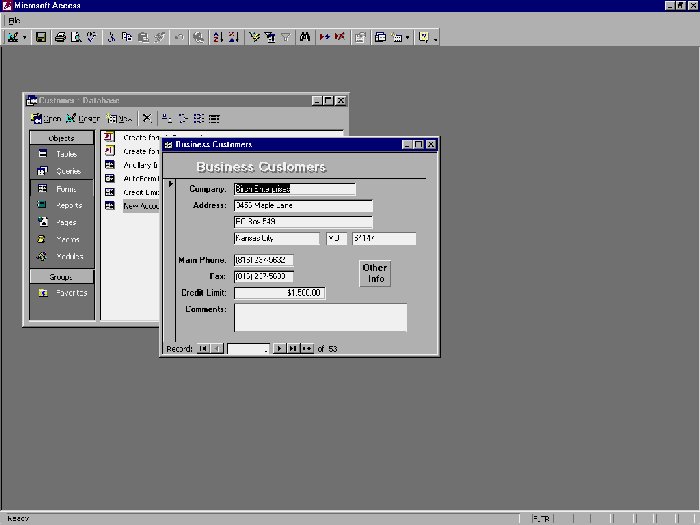
Figure 19-15 Using the custom menu.
Note that the custom menu system you designed in the previous section is now the only menu visible when the New Account Setup form is open. When the form is closed, Access hides the custom menu and displays the default Access menu bar again.
Learn Access Now! Chapter 18 Previous Section in Chapter 19 Next Section in Chapter 19 Chapter 20