Learn Access Now! Chapter 1 Previous Section in Chapter 2 Next Section in Chapter 2 Chapter 3
Chapter 2: Access in an Hour
(This is section 3 of 7 in this chapter)
Entering Information in Your Table
One of the primary ways to enter information in a table is through the Datasheet. In Chapter 1, "Getting Started with Access," you learned that you enter data into a table using an Access datasheet. Now that you have created your own table, you are ready to start using the Datasheet for your own information.
Your Datasheet is shown in Figure 2-10. The actual layout of your Datasheet may be a bit different, depending on which fields you used when you defined your table. But regardless of the fields used, all operations within the Datasheet are essentially the same.
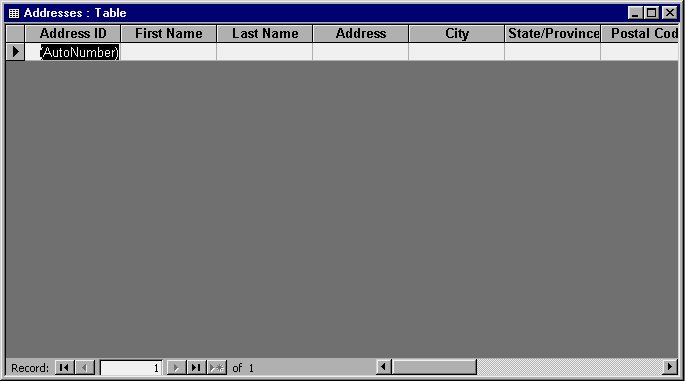
Figure 2-10 The Datasheet view of your table.
Notice that the cursor is blinking in the first field of the first record in your table. Access is waiting for you to begin entering information. To do this, just start typing. When you want to move from field to field, press either the ENTER or TAB key.
Note: Skip any field (by pressing TAB) that already contains something (such as the first field in Figure 2-10, which contains the AutoNumber designation). Since this table was set up so that the AddressID field is the primary key, Access automatically fills in this field.
As you start to enter information in your table, notice that Access assumes you are starting to enter a record. As shown in Figure 2-11, Access signifies this by adding an extra record below, and placing a pencil icon at the left side of, the record on which you are working.
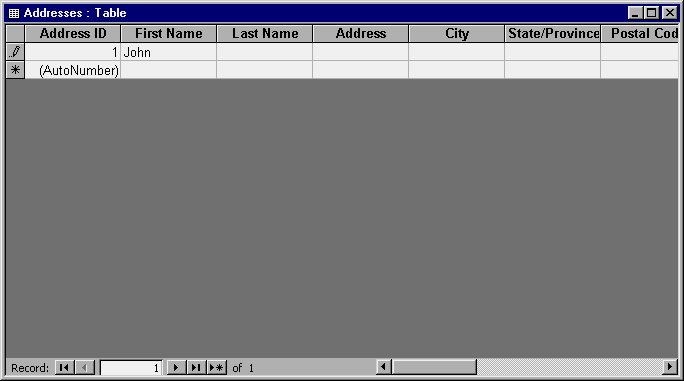
Figure 2-11 Adding a record in Access.
You should continue to add the information to your record. When you reach the last field, press TAB or ENTER. Access, in turn, will take you to the first field of the next record. You can back up through previous fields by pressing SHIFT+TAB. When you finish with one record and proceed to another, Access automatically saves your changes (notice that the pencil icon is removed from the left side of a record that has been saved.)
Moving Around Your Table
As the number of records in your table increases, you can use different keyboard keys to quickly move from one record to another or within fields of a specified record. Table 2-6 lists the keys you can use to navigate through your table.
| Keypress | Action | |
|---|---|---|
| TAB | MOVE TO THE NEXT FIELD | |
| SHIFT+TAB | MOVE TO THE PREVIOUS FIELD | |
| ENTER | MOVE TO THE NEXT FIELD | |
| RIGHT ARROW | MOVE TO THE NEXT FIELD | |
| LEFT ARROW | MOVE TO THE PREVIOUS FIELD | |
| DOWN ARROW | MOVE TO THE NEXT RECORD | |
| UP ARROW | MOVE TO THE PREVIOUS RECORD | |
| PAGE DOWN | MOVE DOWN ONE SCREEN OF RECORDS | |
| PAGE UP | MOVE UP ONE SCREEN OF RECORDS | |
| HOME | MOVE TO THE FIRST FIELD IN THE CURRENT RECORD | |
| END | MOVE TO THE LAST FIELD IN THE CURRENT RECORD | |
| F5 | JUMP TO A SPECIFIC RECORD NUMBER | |
| CTRL+DOWN ARROW | MOVE TO THE CURRENT FIELD OF THE LAST RECORD IN THE TABLE | |
| CTRL+UP ARROW | MOVE TO THE CURRENT FIELD OF THE FIRST RECORD IN THE TABLE | |
| CTRL+PAGE DOWN | SCROLL RIGHT ONE SCREEN | |
| CTRL+PAGE UP | SCROLL LEFT ONE SCREEN | |
| CTRL+HOME | MOVE TO THE FIRST FIELD OF THE FIRST RECORD IN THE TABLE | |
| CTRL+END | MOVE TO THE LAST FIELD OF THE LAST RECORD IN THE TABLE | |
| CTRL+ALT+END | MOVE TO THE LAST FIELD OF A NEW RECORD (AT THE END OF THE TABLE) |
Table 2-6 Navigating through your table.
Data Entry Shortcuts
In addition to the keys listed in Table 2-6, Access provides a number of shortcut keys you can use when you enter your data. Some shortcut keys you know about; you use them to initiate menu functions. When you select an Access menu, Access displays shortcut keys to the right of menu options. Table 2-7 lists data entry shortcut keys you can use to speed up routine data entry tasks.
| Keypress | Action | |
|---|---|---|
| CTRL+; | INSERTS THE CURRENT DATE | |
| CTRL+ALT+SPACEBAR | INSERTS THE DEFAULT VALUE FOR A FIELD (IF ANY) | |
| CTRL+' | INSERTS THE SAME VALUE AS IN THE SAME FIELD OF THE PREVIOUS RECORD | |
| CTRL+" | INSERTS THE SAME VALUE AS IN THE SAME FIELD OF THE PREVIOUS RECORD | |
| CTRL+ENTER | INSERTS A NEW LINE WITHIN THE CURRENT FIELD | |
| CTRL+PLUS SIGN | ACCEPTS THE CURRENT RECORD AND ADDS A NEW ONE | |
| CTRL+- | DELETES THE CURRENT RECORD | |
| SHIFT+ENTER | SAVES CHANGES TO THE CURRENT RECORD, BUT REMAINS IN CURRENT FIELD |
Table 2-7 Shortcut keys for entering data.
Leaving the Datasheet
When you finish entering information, you will probably want to leave or close the Datasheet. This tells Access you are done working with the table, and you are ready to perform some other task. There are two primary ways you can leave the Datasheet: select the Design view tool or click your mouse on the Close icon (the X) in the upper-right corner of the Datasheet.
The Design view tool is the leftmost tool on the toolbar. Click your mouse on this tool to display another side of your table. Your screen will appear similar to what is shown in Figure 2-12.
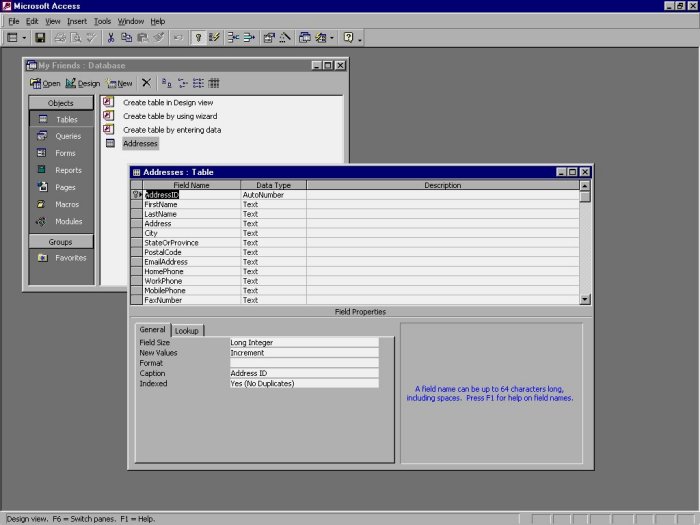
Figure 2-12 Switching to Design view.
When you switch to Design view, the Design view tool changes to the Datasheet tool. Clicking your mouse on the Datasheet tool displays your table's Datasheet again. When you are working in Design view (as shown in Figure 2-12), Access lets you change your table's layout. Design view displays the same fields you set up when you used the Table Wizard earlier in the chapter. In Chapter 3, "Taking a Closer Look," you will learn more about how you use Design view.
To close a Datasheet or Design view window, click your mouse on the Close icon in the upper-right corner of the window. Access closes the window, and the Database window is left visibile. Your new table (Addresses) is listed in the available tables in the Database window. When you later want to work with the information in your table, you can either double-click your mouse on the table name in the Database window or select the table name and click your mouse on the Open button.
Learn Access Now! Chapter 1 Previous Section in Chapter 2 Next Section in Chapter 2 Chapter 3