Learn Access Now! Chapter 3 Previous Section in Chapter 4 Next Section in Chapter 4 Chapter 5
Chapter 4: Creating Another Database
(This is section 2 of 4 in this chapter)
Creating a Table From Scratch
At this point, you are ready to create a table for your new database. In Chapter 2, you used the Table Wizard to make creating a table easy. This is not to imply that creating a table manually is difficult; on the contrary, it is a sure-fire way to understand your tables intimately.
In the rest of this chapter, you will learn how to develop your own table without using the Table Wizard. In doing this, you will use much of the information you learned in Chapter 3, "Taking a Closer Look." This table will contain a list of your customers. (If you don't have a business, just pretend you do.) Even though you could use the Table Wizard to construct this table, the result wouldn't be nearly as well-suited to your needs as a manually created table.
In order to manually create a table, you need to go through primary stages: design and layout. The following sections discuss these stages in detail.
The Design Stage
You seldom use the computer during the design stage. Instead, you sit down with a pencil and paper and decide what information you want in your database. Specifically, you determine what data you need to track and the characteristics (data types, formats, and so on) of that data. Although there are many books on the market which discuss the theory and practice of database design, you don't need to read them to design a simple database. All you need to do is ask yourself (and answer) the following questions:
- What should I call my table?
- What pieces of data will I need to maintain?
- What data type is best suited for each piece of data?
- How much storage space should be set aside for each piece of data?
- How should the pieces of data be organized?
- Do I need a unique key (a primary key) for my data?
There are many other questions you can ask yourself. In fact, you could pull together quite a bit of detailed information before you even sit in front of the computer. But if you can at least answer the above questions, you will be able to put together your first table.
A Table Design Form
As mentioned in the previous section, the best way to design your table is with a pencil and paper. With that in mind, you might want to create a table design form you can use as you work on your design. Figure 4-4 shows an example of such a form.
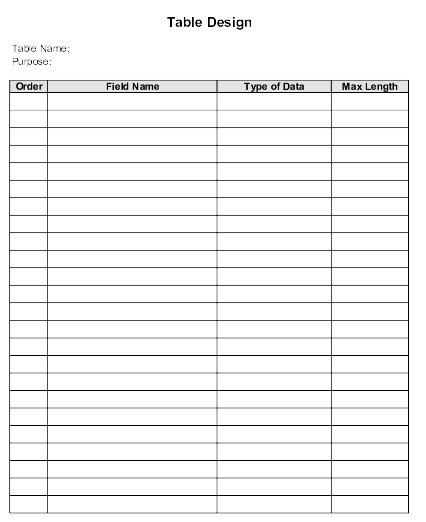
Figure 4-4 A sample table design form.
You should first determine a name for your table. Since this table will contain a list of business customers, use Business Customers as the table name. Write that name at the top of the design form.
Planning the Table Fields
On a scrap sheet of paper, write the names of the fields you'd like to use in your table. Don't worry about the order they are in; consider this a "brainstorming session." For your field names, you might include company name, address (perhaps two address lines for long addresses or suite numbers), phone number, fax number, contact name, and so on.
Table 4-1 shows a list of field names which you can use for the Business Customers table. If you have not already done so, you should enter each of these field names in your table design form. Normally, you would enter the field names you wrote down during your brainstorming session. However, so your database matches the examples shown in this book, use only the field names listed in Table 4-1.
| Field Name | Meaning | |
|---|---|---|
| Company Name | Name of the company | |
| Address 1 | First address line | |
| Address 2 | Second address line | |
| City | City | |
| State | State | |
| Zip Code | Zip Code | |
| Main Phone | Phone number for the company switchboard | |
| Fax Number | Fax phone number | |
| Account Number | Customer account number | |
| Salesperson | Who handles the account | |
| Credit Limit | The amount the account can buy on credit | |
| Account Opened | Date the account was set up | |
| Last Order | Date of last order | |
| Active | Specifies if this is an active or inactive account | |
| Contact | Company contact name | |
| Contact Phone | Phone number for the contact | |
| Comments | Anything necessary to record |
Table 4-1 Field names for the Business Customers table.
Picking Data Types
A field's data type specifies the type of value the field will hold, such as date, text, or currency value. Your next step in defining your table is to determine each field's data type. Table 4-2 lists the Access data types.
| Data Type | Meaning | |
|---|---|---|
| AutoNumber | A sequential number Access fills in automatically as you add records. | |
| Currency | A number accurate to 15 decimal places to the left of the decimal point and 4 places to the right. | |
| Date/Time | A number representing any date or time between the year 100 and 9999. | |
| Hyperlink | An active link to another document, URL, or location within a document. | |
| Memo | A long text string, up to 64,000 characters. | |
| Number | A numeric value. | |
| OLE Object | Objects such as sound clips or graphical images. | |
| Text | Any characters, up to a length of 255 characters. | |
| Yes/No | A yes or no value. |
Table 4-2 Data types supported by Access.
For most of the fields in your table, you will use a Text data type. But for some, you will find other data types more appropriate. For instance, you should use a Yes/No data type for the Active field, the Date/Time data type for the Date Opened and Last Order fields, and a Memo data type for the Comments field. Table 4-3 lists the data type you should use for each field in your table. You should write these data types in the Type of Data column of your table design form.
| Field Name | Type of Data | |
|---|---|---|
| Company Name | Text | |
| Address 1 | Text | |
| Address 2 | Text | |
| City | Text | |
| State | Text | |
| Zip Code | Text | |
| Main Phone | Text | |
| Fax Number | Text | |
| Account Number | AutoNumber | |
| Salesperson | Text | |
| Credit Limit | Currency | |
| Account Opened | Date/Time | |
| Last Order | Date/Time | |
| Active | Yes/No | |
| Contact | Text | |
| Contact Phone | Text | |
| Comments | Memo |
Table 4-3 Data types for the fields in the Business Customers table.
Notice that Table 4-3 assigns the AutoNumber data type to the Account Number field. Because Access automatically calculates this data type with each new record, you can leave it up to Access to assign your customer account numbers.
Determining Field Lengths
As shown in Table 4-2, a text field can hold up to 255 characters, and a memo field can hold up to 64,000 characters. Your next step in your table design is to determine the lengths of your fields. For some fields, you won't need to do this. For example, neither the Credit Limit field nor the Active field will have a length because their data types don't require lengths. However, you will have to specify lengths for all the other fields.
To appropriately determine maximum field lengths, you need to thoroughly understand the data your table will contain. For instance, you need to know if you will maintain a 5-digit or a 9-digit ZIP code for your customers. Likewise, you should know how much space you need in the Company Name and Address fields.
If you thoroughly understand your data, you can choose the lengths that best meet your needs. Although Access will always let you change field lengths, even after you start entering data in the table, you should think about your data now in order to avoid frustration and duplicate work later. Table 4-4 lists the maximum field lengths you should use for the Business Customers table.
| Field Name | Max Length | |
|---|---|---|
| Company Name | 35 | |
| Address 1 | 40 | |
| Address 2 | 40 | |
| City | 25 | |
| State | 2 | |
| Zip Code | 9 | |
| Main Phone | 10 | |
| Fax Number | 10 | |
| Account Number | (not applicable) | |
| Salesperson | 35 | |
| Credit Limit | (not applicable) | |
| Account Opened | (not applicable) | |
| Last Order | (not applicable) | |
| Active | (not applicable) | |
| Contact | 35 | |
| Contact Phone | 10 | |
| Comments | (not applicable) |
Table 4-4 Field lengths for the Business Customers table.
Ordering Your Fields
Finally, you need to determine the order in which you want the fields to appear in your table and specify that order on your table design form.
Remember, earlier in the design process you wrote down fields in the order that they popped into your head. Because ordering fields (like selecting field lengths) is a subjective process based solely on your needs and the needs of your organization., you normally might place the fields in the order they occurred to you during your brainstorming session. In the Order column of your table design form, you would place a 1 next to the first field, a 2 next to the second field, and so on.
However, for our purposes here, use the order specified in Table 4-5. Enter this information into the Order column of your table design form.
| Field Name | Order | |
|---|---|---|
| Company Name | 2 | |
| Address 1 | 3 | |
| Address 2 | 4 | |
| City | 5 | |
| State | 6 | |
| Zip Code | 7 | |
| Main Phone | 8 | |
| Fax Number | 9 | |
| Account Number | 1 | |
| Salesperson | 16 | |
| Credit Limit | 13 | |
| Account Opened | 12 | |
| Last Order | 14 | |
| Active | 15 | |
| Contact | 10 | |
| Contact Phone | 11 | |
| Comments | 17 |
Table 4-5 Field order for the Business Customers table.
Before you enter the information on your table design form into Access, you should decide whether you want to use a primary key for your table. In Chapter 2 you learned that Access uses a primary key to order records and locate them quickly. The primary key is typically a unique value (meaning there can be no duplicates in the table), but it does not have to be.
In the Business Customers table, there are several fields that you can use as a key. For instance, you could use the Company Name field as a key. However, since you could have two companies with the same name, you may want to look for another key that is more unique. If you cannot find another, then you could use the Company Name field and just allow for duplicates.
You can also use the Account Number field as a key. By definition, this number should be unique. Remember, Access automatically creates the account number for you using a AutoNumber field. And because the Account Number is unique, it makes an ideal primary key. To remind yourself that the Account Number field will be your primary key, circle that field's number (1) in the Order column of your table design form.
The Layout Stage
After you finish designing your table, you are ready to use Access. With the table design form in hand, you can quickly and easily layout the database. All you need to do is type, in the proper order, the information from the table design form to the Design view window. To create the Business Customers table, follow these steps:
- If necessary, start Access and load the Customer database. This is the database created earlier in this chapter.
- From the Database window, select the Tables button. There should be no tables listed since none have been created yet.
- Double-click your mouse on the Create Table in Design View option. Access displays the Design view window shown in Figure 4-5.
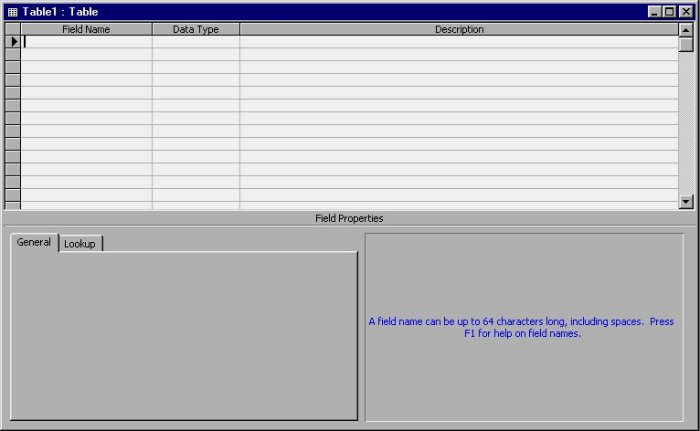
Figure 4-5 The Design view window.
In Chapter 3 you learned how to use the Design view window to change the layout of an existing table. Here you will use it to create a new table. In this case, the Design view window is completely empty. Notice also that the cursor is blinking in the first row, in the Field Name column. Access is ready for you to layout your table.
To start, enter the first field name in your table's order: the Account Number field. Type Account Number and then press ENTER. After Access accepts the field name, the cursor moves to the Data Type column for that field. Your Design view window should now look like what is shown in Figure 4-6. Notice that Access assumes this will be a text field and that default properties for the Text data type appear at the bottom of the Design view window.
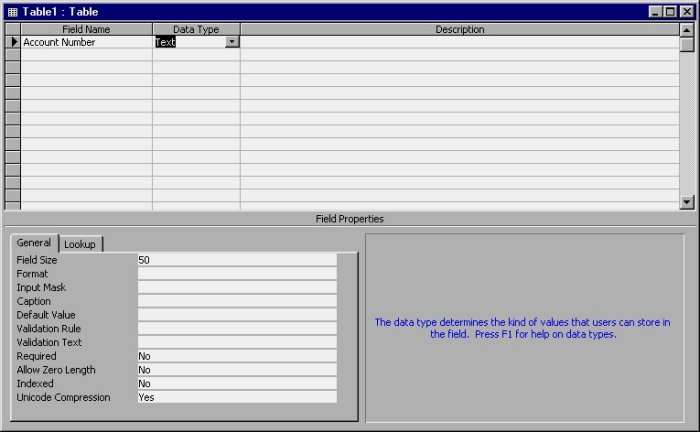
Figure 4-6 The Design view window after entering the first field name.
In your table design form, you specified that the Account Number field is an AutoNumber. To change the field's data type, click your mouse on the arrow at the right side of the Data Type cell. Access, in turn, displays a drop-down list of data types. Click your mouse on the AutoNumber data type.
The cell should now display AutoNumber as the data type for the Account Number field. Your Design view window should look like the window shown in Figure 4-7. Also, notice that, along with the data type, Access has changed the field's properties.
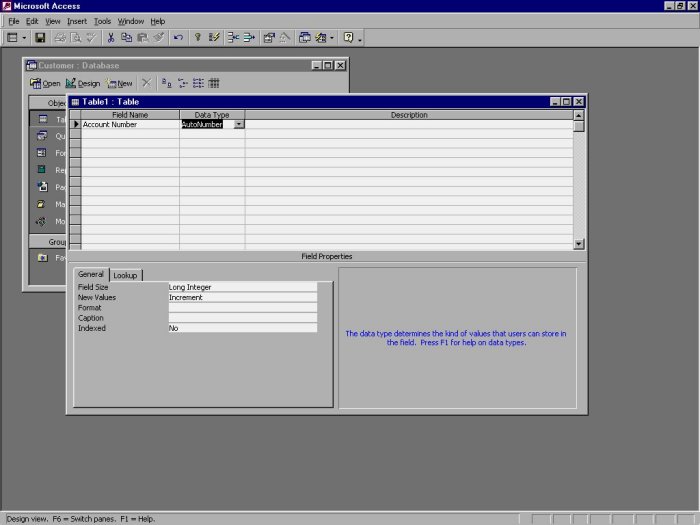
Figure 4-7 The Design view window after changing the data type.
When you press ENTER, your cursor moves to the Description column. You can enter comments about the field, if you wish. For the Account Number field, you may include a comment that reminds you or another user that this field is a primary key.
When you press ENTER again, Access takes you to the next row, in the Field Name column. Enter the name of your second field (Company Name) and then specify its data type. Do this in the same way that you entered the last field's information.
Before you leave the row containing the Company Name field, take a look at the properties shown at the bottom of the Design view window (see Figure 4-8). You already know that these are defaults for the Text data type. Notice that Access sets the Field Size property to 50.

Figure 4-8 The Design view window after specifying the data type for the second field.
Since you specified on the table design form that the length should be only 35, you will need to adjust the Field Size property. Use your mouse to select the Field Size property and change it to 35. Then, use your mouse to return to the Field Name column, in the third row, and enter your next field.
Go ahead and enter all 17 fields in the Business Customers table. As you enter each field in the table, make sure you set the Data Type property and change the Field Size property, when necessary. When you are done, your Design view window should appear as shown in Figure 4-9.
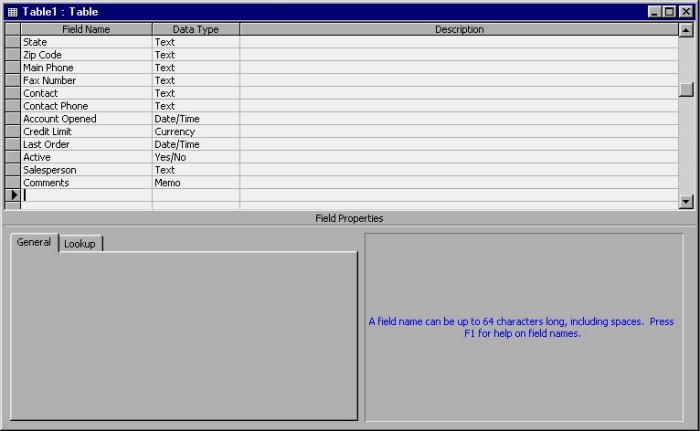
Figure 4-9. The Design view window after entering the last field.
After you finish entering all your fields, you must specify your primary key. To do this, scroll back through the table design until you can see the Account Number field on the screen. Select the field and then click your mouse on the Set Primary Key tool. In response, Access will display a key in the gray area to the left of the Account Number row (see Figure 4-10).
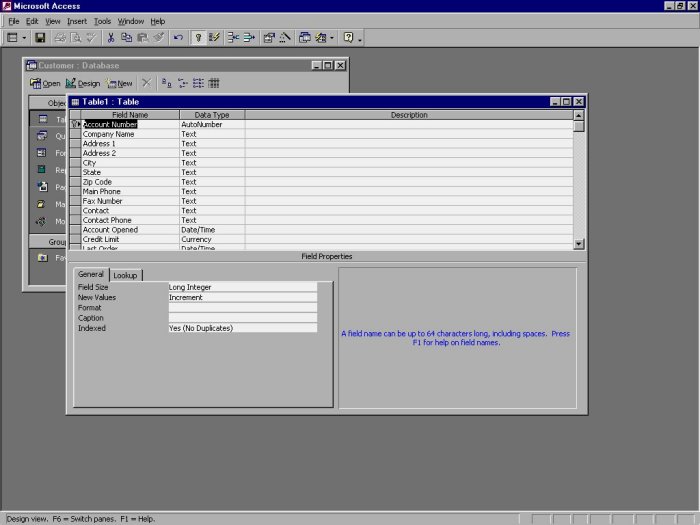
Figure 4-10 The finished Design view window.
You have now laid out your entire table, and you are ready to save your work to disk. To save your table, simply close the Design view window. To do so, click your mouse on the Close button in the upper-right corner of the window. In response, Access asks if you want to save your work (see Figure 4-11).

Figure 4-11 Access asks if you want to save your work.
To save your work, click your mouse on the Yes button. Access then asks you to specify a name for the table, as shown in Figure 4-12.
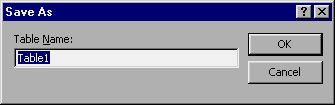
Figure 4-12 Saving your table contents to a named table.
Type the name you wrote at the top of your design form: Business Customers. Press ENTER or click your mouse on the OK button to save your table under that name.
Note: If you save the table under the wrong name, don't let it bother you. You can use the information presented in Chapter 3 to rename your table.
Learn Access Now! Chapter 3 Previous Section in Chapter 4 Next Section in Chapter 4 Chapter 5