Learn Access Now! Chapter 5 Previous Section in Chapter 6 Next Section in Chapter 6 Chapter 7
Chapter 6: Using Queries to Examine Your Data
(This is section 2 of 4 in this chapter)
Using the Query Wizards
Access actually includes four different query Wizards, and there is only one place you can see them all. Choose Query from the Insert menu. Access displays the New Query dialog box, as shown in Figure 6-2.

Figure 6-2 The New Query dialog box.
Notice that there are five options listed in the dialog box. The first option (Design View) is not really a query; it allows you to create a query from scratch. The purpose of the other four options is as follows:
- Simple Query Wizard. This option allows you to create a very simple select query. This Wizard is the same one that is run if you double-click your mouse on the Create Query By Using Wizard option in the Database window. (See Figure 6-1.)
- Crosstab Query Wizard. This option creates a simple Crosstab query, as defined earlier in the chapter.
- Find Duplicates Query. Creates a Select query that displays duplicate records in a table.
- Find Unmatched Query. Creates a query that displays records that have no relationship with records in different tables. (This query is useful when working with relational databases, a concept introduced in Chapter 13, "Understanding Data Relationships.")
Your query selection will determine which Wizard is used by Access. In the following sections, you will learn how to use three out of the four Wizards represented here. (It is premature to discuss the Find Unmatched query in this chapter, but you will understand how such a query is used after learning the information in Chapter 13.)
Creating a Simple Query
To create a simple query, select this option from the New Query dialog box and then click your mouse on the OK button. As an alternative, you can also double-click your mouse on the Create Query By Using Wizard option, available when the Queries button is selected in the Database window. Access then displays the Simple Query Wizard dialog box shown in Figure 6-3.
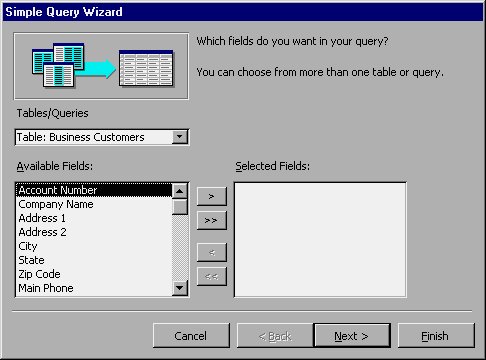
Figure 6-3 The Simple Query Wizard dialog box.
At the left side of the Simple Query Wizard dialog box, you can use the drop-down list to specify what Access should use as the source for this new query. Remember that you can use either tables or other queries as your source. Since the Customers database has only one table (the Business Customers table), Access has already selected it for you. If you were working with a database that contained several other tables and queries, you could use the drop-down list to change what the Wizard uses as a data source.
In the lower-left portion of the dialog box is a list of all the fields defined in the selected table or query. If you change the data source in the pull-down list (described in the previous paragraph), then the available fields change, as well. You can use the list, and the controls just to the right of the list, to indicate which fields you want included in the query you are creating.
For the purposes of this example, select the Company Name, Address 1, Address 2, City, State, and Zip Code fields. Make sure that after selecting each one, you click your mouse on the > button. Access then displays the name of each field in the Selected Fields list at the bottom right of the dialog box. When you are done selecting these fields, the dialog box appears as shown in Figure 6-4.
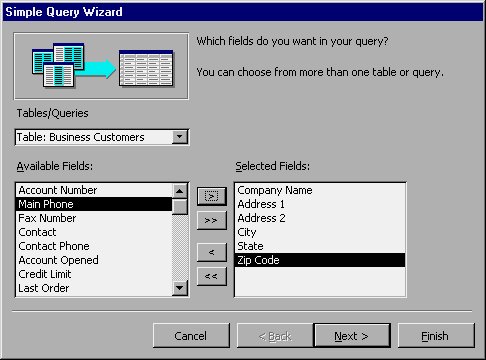
Figure 6-4 The Simple Query Wizard dialog box after selecting some fields.
With the fields selected, you are ready to proceed to the next step in the Wizard. Click your mouse on the Next button, and Access displays the dialog box shown in Figure 6-5. This is the final dialog box in this Wizard.
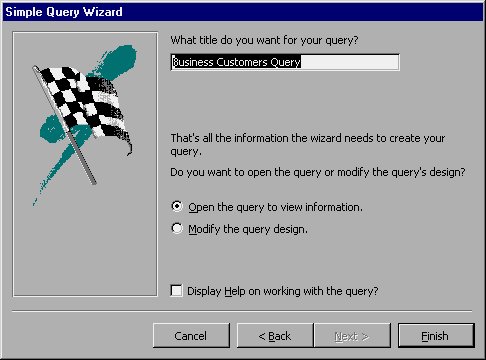
Figure 6-5 The final dialog box for the Simple Query Wizard.
Here you can enter a name that you want used to save your query. The suggested name is simply the table name on which the query is based (Business Customers) to which the word "Query" is added. The simple query you created using the previous dialog box can be used as the basis for mailing labels, since it only contains the address information for your customer list. Enter the name Address List, and then click your mouse on Finish. Access displays the results of your query, as shown in Figure 6-6.
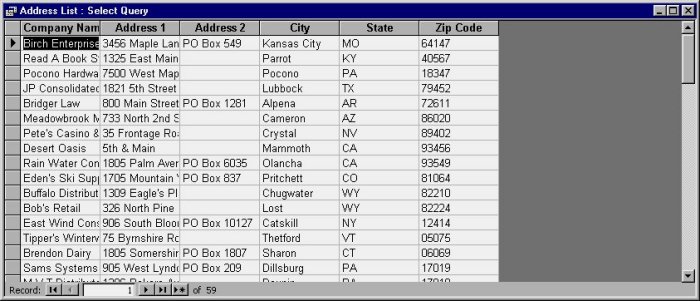
Figure 6-6 The results of the Simple Query Wizard.
Creating a Crosstab Query
To create a Crosstab query, first open the New Query dialog box by choosing Query from the Insert menu. Then select the Crosstab Query Wizard option from the New Query dialog box and then click your mouse on the OK button. Access displays the Crosstab Query Wizard dialog box shown in Figure 6-7.
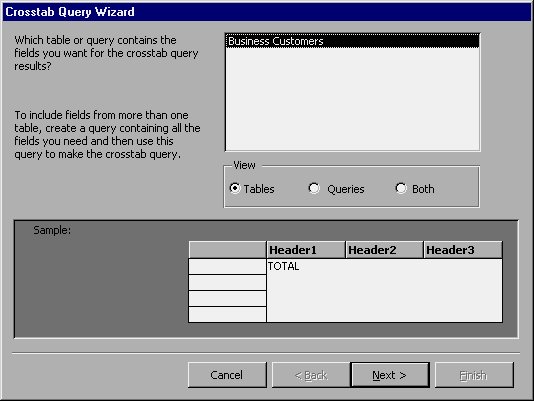
Figure 6-7 The Crosstab Query Wizard dialog box.
At the top of the Crosstab Query Wizard dialog box, Access asks you to select the table from which you want to query data. Since this database has only one table (the Business Customers table), Access has already selected it for you. If you were working with a database that contained several other tables and queries, you could use the View area in the center of the dialog box to change what the Wizard displays as data sources.
At the bottom of the dialog box, the Wizard displays how your finished Crosstab query will appear. Access updates this representation every time you make a change while you are using the Wizard. To proceed to the next dialog box (shown in Figure 6-8), click your mouse on the Next button.
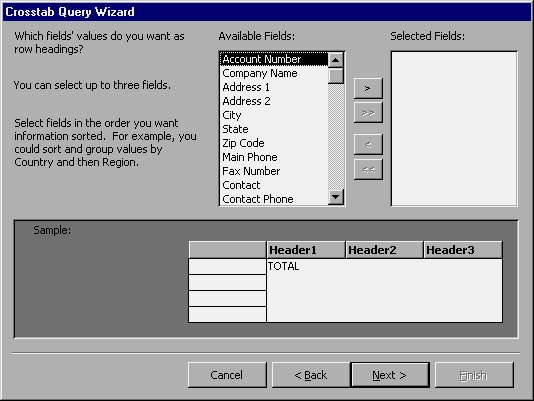
Figure 6-8 Getting ready to select rows.
A Crosstab query lets you define what should appear in both the rows and columns of the resulting display. Using the Wizard, you should indicate which fields you want to appear in each row.
For this example, assume you want to tabulate the number of active and inactive accounts you have, by sales rep and by state. In the Available Fields list, you should select the Salesperson field and then click your mouse on the > button. Notice that the Wizard updates the sample crosstab at the bottom of the dialog box.
Next, you should select the State field and click your mouse on the > button. Again, notice that the Wizard updates the sample crosstab at the bottom of the dialog box, as shown in Figure 6-9.
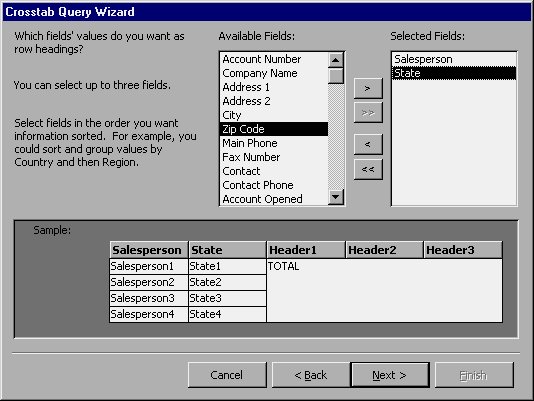
Figure 6-9 The crosstab query after selecting row heading.
You have just told Access to display the salesperson and the state on the left side of the crosstab. Click your mouse on the Next button. Access displays the dialog box shown in Figure 6-10.
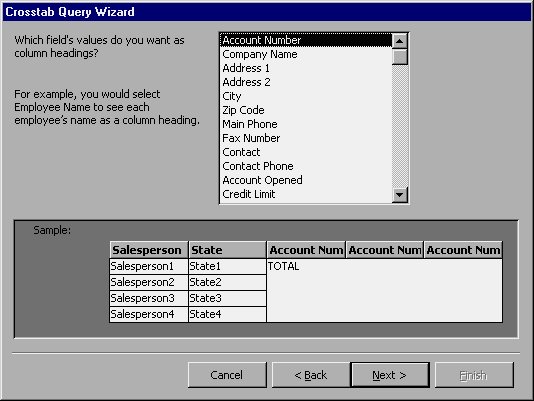
Figure 6-10 Getting ready to select columns.
In this dialog box, Access asks you to select which fields it will tabulate into the columns. Since you want this query to indicate how many accounts are active and inactive for each sales rep, you should select the Active field. After you select the Active field, notice that Access updates the sample at the bottom of the dialog box. Click your mouse on the Next button when you are ready to proceed. Access displays the dialog box shown in Figure 6-11.
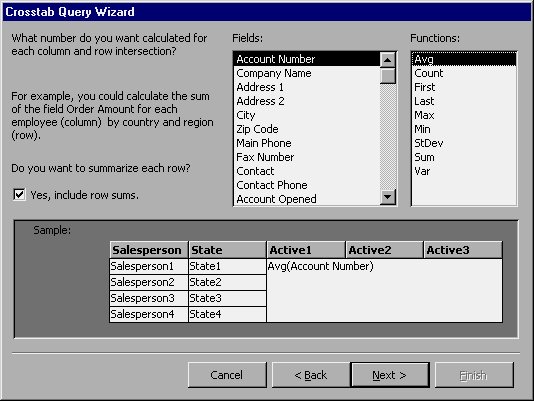
Figure 6-11 Picking an operation for the query.
In this dialog box, Access asks you to specify what you want the query to calculate. At the right side of the dialog box, the Functions box lists all the different operations available to you. You can perform any of these operations on any field you like, although some combinations of fields and operations may not make sense. For example, if you choose a text field, performing an average on it doesn't make sense; you should only perform that operation on a numeric or currency field.
To finish out this query, select the Company Name field and then choose the Count operation. Notice that the information in the sample area of the dialog box changes with your selection. The query will then calculate how many active and inactive accounts (there is a company name for each account) there are in each state for each sales rep.
Finally, notice that there is a check box you can use to indicate whether the query should provide a summary for each row. For a simple crosstab that only has two real columns (active or inactive), a summary is probably unnecessary. Click your mouse on the check box to turn the summary off. After the selection is made, you can click your mouse on the Next button. Access will display the dialog box shown in Figure 6-12.
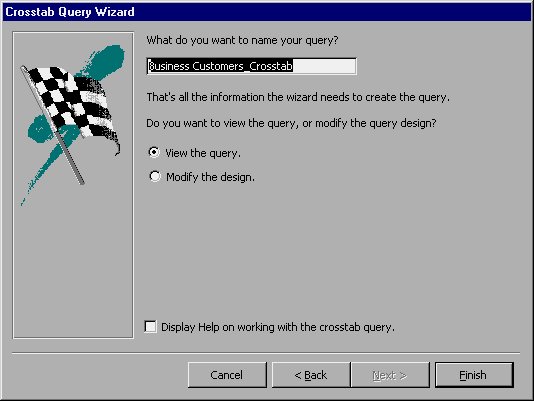
Figure 6-12 Access asks you to name your query.
At this point, you are done creating the query, and you need to save it. In this dialog box, Access asks you what name it should use for the query. As with names for other parts of your database, you should use something that is descriptive, such as Active Account Tally. Type in this name and click your mouse on the Finish button. Access saves your query, updates the query list in the Database window, and then opens the query to show you the results of your work. Figure 6-13 shows an example of how this query should turn out.

Figure 6-13 Results of the new query.
When you look at the crosstab, one of the first things you will notice is that the columns have headings of -1 and 0. Remember that the Active field is a Yes/No field, which means Access stores this field's values as one of two numbers: -1 and 0. As such, these numbers are also what Access displays in the headings. Later in this chapter, you will learn how to change the headings by changing the properties associated with the query.
If you look past this oddity in the headings, you can see that the crosstab provides the information you requested. It shows the number of accounts on active (Yes, or -1) and inactive (No, or 0) status for each state and each rep. The Crosstab Query Wizard made it easy for you to create this view of your data.
Creating a Find Duplicates Query
You can also use the New Query dialog box to create a Find Duplicates query, which lets you quickly search a table for duplicate fields. Select the Find Duplicates Query Wizard option in the dialog box and click your mouse on the OK button. Access, in turn, displays the Find Duplicates Query Wizard dialog box shown in Figure 6-14.
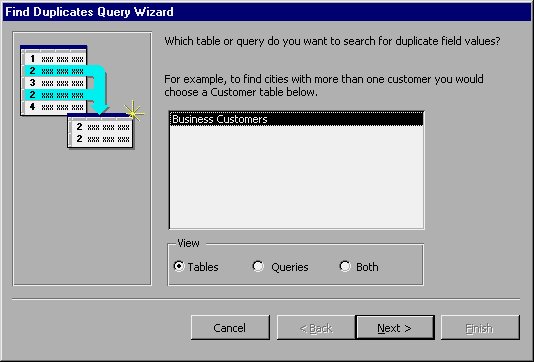
Figure 6-14 The Find Duplicates Query Wizard dialog box.
In this dialog box, Access lists the data sources you can use for this query. Typically, you would use a table as your data source, but with this Wizard you can also use another query. Because the Business Customers table is the only item in the Customers database, Access has already selected this table for you. You can click your mouse on the Next button to move to the dialog box shown in Figure 6-15.
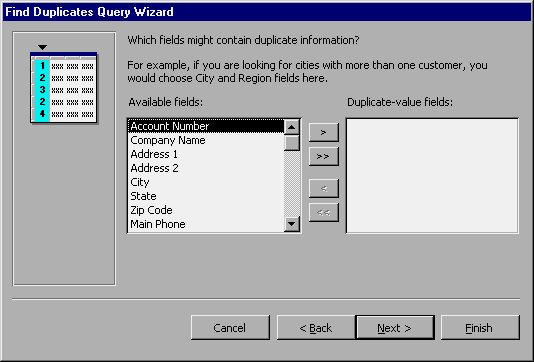
Figure 6-15 Selecting a field to check.
In this dialog box, Access asks you which fields you want to check for duplicate values. Although there is no limit to the number of fields you can have your query check, you should select only those fields necessary to ensure there are no duplicates. The more fields you ask your query to check, the longer it will take to run. In the case of the Business Customers table, you will probably only need to check the Company Name and Contact fields to determine if there are duplicates.
First, select Company Name and click your mouse on the > button. Next, select the Contact field and click your mouse on the > button. Access then displays the two fields, in order, in the list at the right side of the dialog box. After you specify these fields, click your mouse on the Next button. Access displays the dialog box shown in Figure 6-16.
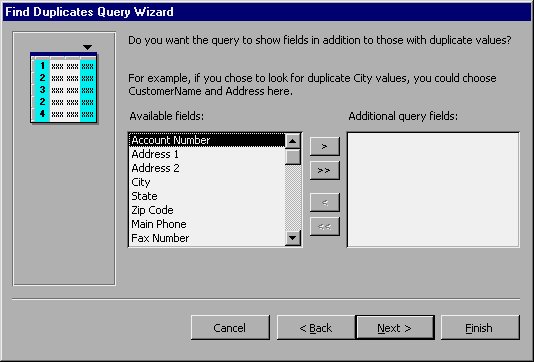
Figure 6-16 Displaying additional information.
In this dialog box, Access asks if you want your query to display any additional information. When you review duplicate records, you can use this information to help you determine which ones you want to save and which you want to delete. For the Business Customers table, you may want Access to display the Contact Phone, Last Order, and Salesperson fields. Select a few of these fields (remember to click your mouse on the > button after you highlight each one). Access adds each field's name to the list at the right side of the dialog box. When you finish picking your fields, click your mouse on the Next button. Access displays the dialog box shown in Figure 6-17.
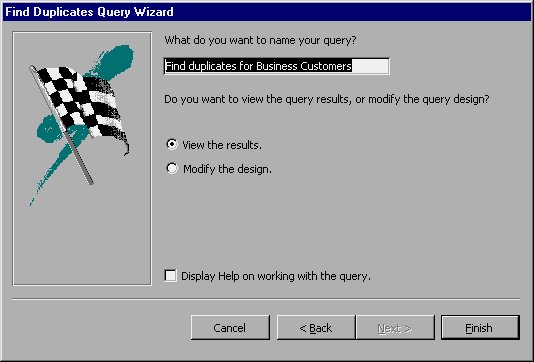
Figure 6-17 Finishing up the query.
Now that you have finished creating your query, Access asks you to give it a name. Since the Wizard's suggested name for this query is quite descriptive, click your mouse on the Finish button to tell Access you accept it. Access saves your query under this name and updates the query list in the Database window. Access opens the query to show you the results of your work. Figure 6-18 shows an example of how this query should turn out.
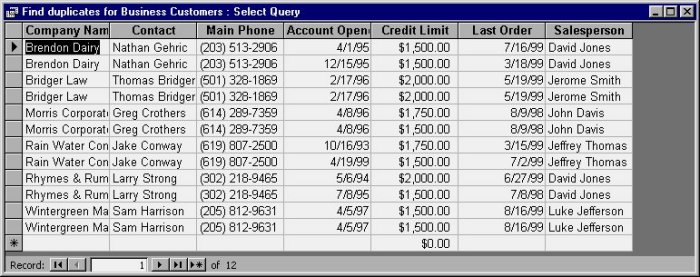
Figure 6-18 The results of the Find Duplicates query.
You can now review the duplicates and decide what you want to do with each of them. If you delete any record in the display, Access will delete the corresponding record in the underlying table (Business Customers). For this reason, Find Duplicates queries can be very helpful in managing the information in your table.
Learn Access Now! Chapter 5 Previous Section in Chapter 6 Next Section in Chapter 6 Chapter 7