Learn Access Now! Chapter 6 Previous Section in Chapter 7 Next Section in Chapter 7 Chapter 8
Chapter 7: Printing Your Table
(This is section 3 of 5 in this chapter)
Printing Your Layout
Access lets you print the layout of your tables or any other database object you might have defined (such as queries, forms, or macros). You do this using a feature which Access calls the Documenter. To print a layout report, choose the Analyze option from the Tools menu. Access displays a submenu from which you should choose Documenter. Access then displays the Documenter dialog box, as shown in Figure 7-8.
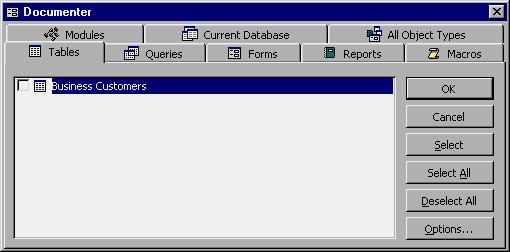
Figure 7-8 The Documenter dialog box.
If you had a particular object selected before you invoked the Documenter, the type of object you selected controls which tab of the Documenter dialog box Access displays. You can specify a different object type, however, by simply clicking your mouse on the appropriate tab. Access then displays the defined objects that fit the category you selected.
Next, select the check box next to the object or objects for which you want a report printed. For instance, if you wanted a layout report for the Business Customers table (Figure 7-8), then you should make sure the check box to the left of the Business Customers object is selected. Next, click your mouse on the Options button. Access displays the Print Table Definition dialog box, shown in Figure 7-9.
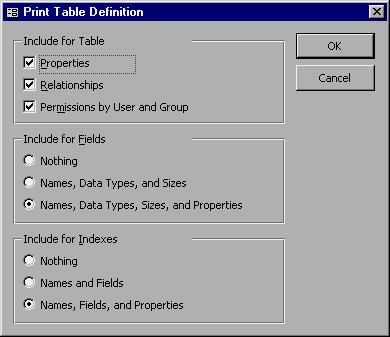
Figure 7-9 The Print Table Definition dialog box.
The Print Table Definition dialog box lets you specify the parts of the table definition you want Access to print. In the first section, you specify the table attributes you want Access to include in the printout. The other two sections let you indicate the level of detail for both fields and indexes. (Indexes are an advanced form of keys for tables. They are not used very often, except for specialized databases. You create indexes when you are designing your table.) Make your adjustments, if necessary, and then click your mouse on the OK button.
Note: If you choose to print the layout of different database objects (besides tables), Access replaces the Print Table Definition dialog box with an appropriate dialog box for the selected object type.
Now click your mouse on OK in the Documenter dialog box. Access examines your table (or other database objects you selected) and produces a definition printout. After a short time, Access displays the printout on your screen, as shown in Figure 7-10.
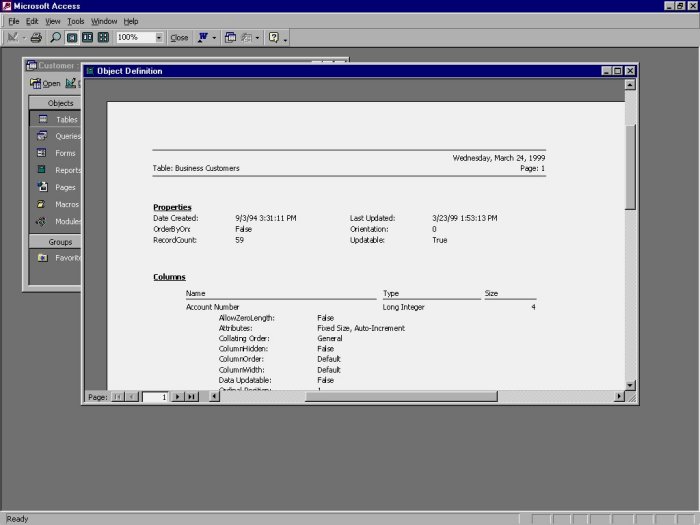
Figure 7-10 The Print Definition for a table.
Before printing the definition to the printer, Access gives you a chance to see it on the screen. This viewing process is a print preview; it lets you make sure everything is OK before you actually print a copy of the printout. Notice that Access greatly reduces the number of toolbar tools at the top of the screen. There are only a few tools which you will typically use in this display:
- Print. This tool displays the Print dialog box, with the ultimate goal of sending the report to the printer.
- Zoom. There are actually two zoom tools. One looks like a magnifying glass; it alternates between close-up and full-page views of the printout. The other is the percentage tool; it allows you to indicate a specific percentage for zooming.
- Pages Per Screen. These are actually three tools, called One Page, Two Pages, and Multiple Pages. These three tools allow you to specify how many pages are displayed on your screen at the same time.
- Close Window. This tool cancels printing the report and returns you to the Database window.
In addition to the Zoom tool, you can also use your mouse to zoom in and out. Notice that when you move it over the page, the mouse pointer appears as a magnifying glass. If you click your mouse, Access alternately displays a close-up or full-page view. When you first saw the report (as shown in Figure 7-10), it was in close-up view. If you want to view it as a full page, simply click your mouse on the page with the mouse. Your screen will then appear as shown in Figure 7-11.
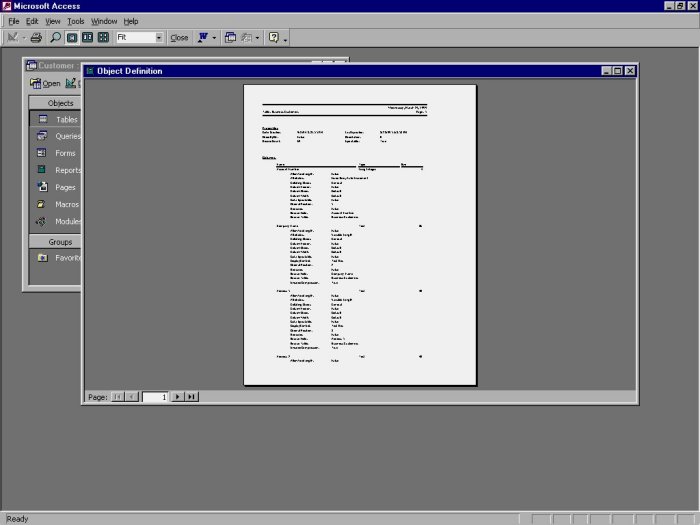
Figure 7-11 Full-page view of the definition printout.
If you use the mouse pointer to click your mouse on the page again, you will see a close-up view of the page, at the point where you clicked on the mouse pointer.
When you are ready to print the definition, click your mouse on the Print tool. Access, in turn, prints the report to your default printer. If, instead of printing, you want to close the printout display, simply click your mouse on the Close tool.
Learn Access Now! Chapter 6 Previous Section in Chapter 7 Next Section in Chapter 7 Chapter 8