Learn Access Now! Chapter 10 Previous Section in Chapter 11 Next Section in Chapter 11 Chapter 12
Chapter 11: Using Your Data with Word and Excel
(This is section 3 of 4 in this chapter)
Sharing Data with Excel
When it comes to analytical capabilities, Access is somewhat lacking. If you really want to analyze numerical data in your database or create a top-notch chart, you need to use a spreadsheet program. This is where Excel comes in handy. Excel lets you analyze your data in ways it is impossible to do in Access. Recognizing that fact, Microsoft made sure you can easily use your Access data with Excel.
The following sections detail how you can use your Access data in an Excel workbook.
Transferring Data to Excel
Access makes it very easy to transfer an entire table to Excel. To do this, open a database such as Customer.mdb, which you created earlier in the book. To then export a file to Excel, follow these steps:
- Display the Database window.
- If you want to use information from a table, click on the Tables button. If you want to use information from a query, click on the Queries button.
- Select the name of the table or query you want to use.
- Choose the Office Links option from the Tools menu, and then choose Analyze It with MS Excel from the resulting submenu.
Access will transfer the information in the selected table or query into an Excel file format. Excel will then automatically start and load the new file (see Figure 11-7). This is the only step you need to take in Access; everything else happens in Excel.
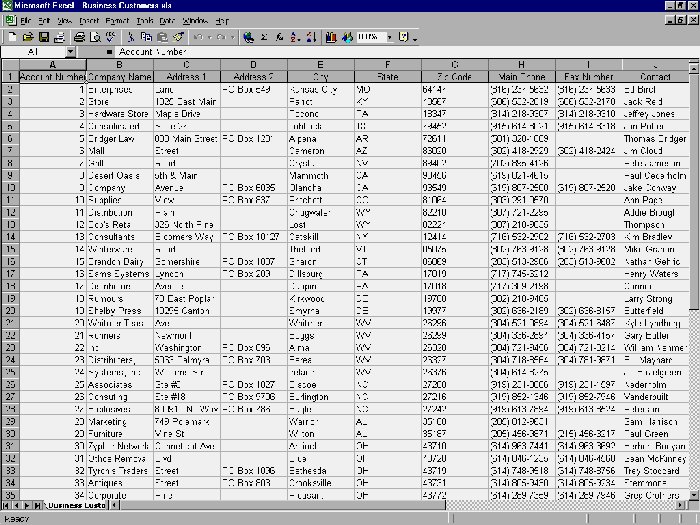
Figure 11-7 Your table loaded in Excel.
Notice that the file uses a name (Business Customers.xls) derived from the name of your Access table. The name of the table was Business Customers; the name of the Excel file is Business Customers.xls.
Sometimes, you will want to transfer only part of a table or query. For example, you may want to export only records 5 through 13 of the Business Customers table. To export only part of a table or query, perform these steps:
- Open the Datasheet for the Business Customers table.
- Select (highlight) rows 5 through 13 or the data you desire.
- Display the Database window.
- Choose the Office Links option from the Tools menu, and then choose Analyze It with MS Excel from the resulting submenu.
Notice that the steps are essentially the same as those you used when transferring an entire table. The only difference is that you select a portion of a table or query, instead of the whole thing. Access and Excel take care of the rest, transferring the desired data and displaying it in Excel.
Linking Information Between Access and Excel
So far you have learned how to output information from Access to Excel. There may be times when you want to establish an actual link between information in Access and Excel. Links are established using OLE (object linking and embedding), a standard for sharing information among Windows programs.
The easiest way to establish a link between Excel and Access is to use Windows cut-and-paste capabilities. To establish a link between Access and Excel, perform these steps:
- In Access, select the table or query you want linked to Excel. (Note that you cannot establish an active link between Excel and only a portion of an Access table or query.)
- Choose the Edit menu Copy option or press CTRL+C. Access will copy the information to the Clipboard.
- Open your Excel window and select the spreadsheet cell where you want the link to begin.
- Choose the Edit menu Paste Special option. Excel will display the Paste Special dialog box, shown in Figure 11-8.
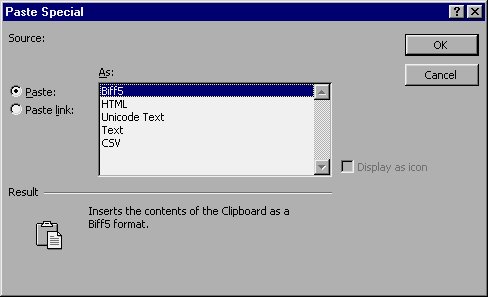
Figure 11-8 The Paste Special dialog box.
- Make sure you select Paste Link at the left side of the dialog box. This forces a link between Excel and Access.
- In the As list, select a data format option. (See the sidebar for additional information on data formats.)
- Click on OK.
Access pastes the information in the Clipboard into the Excel spreadsheet and establishes a link between the information and the original table or query. Your screen will look similar to what is shown in Figure 11-9.
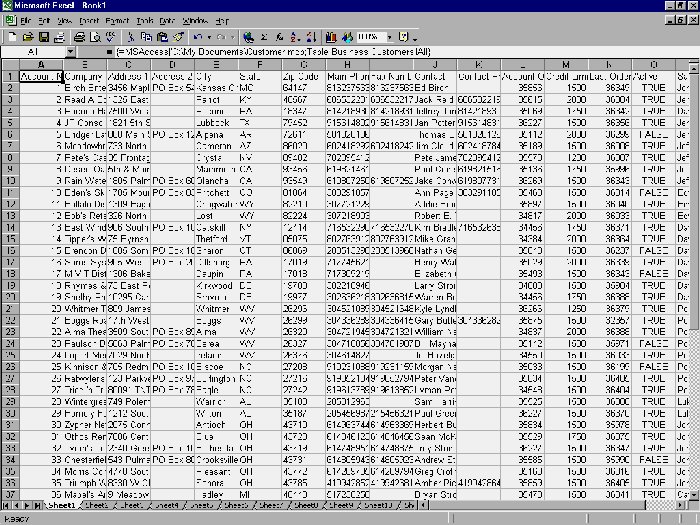
Figure 11-9 Excel, after linking part of an Access database.
Data Formats When Pasting in Excel
When you paste your Access information in Excel, you may have noticed that there are a number of different data formats you can use (see Figure 11-8). Excel offers these choices when pasting Access information:
Biff5. This is the Microsoft Excel Binary Interchange File Format, version 5. (That is a mouthful, isn't it?) This format allows information to appear as close to the original format as possible.
HTML. Excel pastes information in HTML format, which is the native format of the Web.
Unicode Text. The text of the original information is pasted using Unicode (two-byte) characters. All other attributes (formats, appearance, etc.) are left up to Excel. You would use this format if the original information contains foreign language symbols.
Text. Excel pastes the text of the original information. All other attributes (formats, appearance, etc.) are left up to Excel.
CSV. Excel interprets the incoming data as "comma-separated values," meaning that it tries to break fields based on locations of commas in the text. This is not necessarily a good format to use when pasting information from other Microsoft Office programs.
The format you choose should be based on how you want your information to ultimately appear in Excel.
What Is Transferred?
Regardless of whether you are transferring an entire table or query or only part of one, Access transfers more than just raw data. Access also transfers the following formatting information to Excel:
- Font information
- Row height information
- Column width
However, if you use the Clipboard method of linking information and you choose a text-based data format, Access transfers only the data.
Access also transfers a header row which it may format with shaded text (refer back to Figure 11-7). Access provides this row for information purposes only; if you created an output file as discussed in the previous section, Transferring Data to Excel, you can safely delete the row. If you established a link between Excel and Access and there is a header row, you cannot delete it.
What About Updates?
If you simply output Access information into an Excel file format, there is no relationship between the Excel data and what is in Access. In this instance, whenever there is a change in the original Access information, you will need to again output it to an Excel file.
If you establish a link between Excel and Access, the information in Excel is updated automatically as you change the Access data. Specifically, Excel updates the information when you open the Excel spreadsheet.
You can also update the information manually by following these steps:
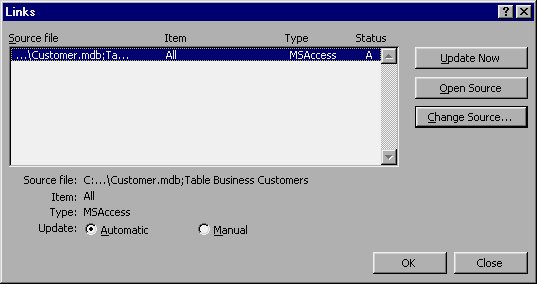
Figure 11-10 The Links dialog box.
- If necessary, select the link you want to update.
- Click on the Update Now button.
- Click on the Close button to close the dialog box and return to your spreadsheet.
Learn Access Now! Chapter 10 Previous Section in Chapter 11 Next Section in Chapter 11 Chapter 12