Learn Access Now! Chapter 15 Previous Section in Chapter 16 Next Section in Chapter 16 Chapter 17
Chapter 16: Ensuring Data Security
(This is section 6 of 7 in this chapter)
Managing Security Accounts
As you are working with the user-level security features of Access, there will be many times when you will need to perform management tasks to fine-tune the security. The following sections describe many of the security-related tasks you can perform.
Creating a New Workgroup Information File
There may be times when you want to create a new workgroup information file for use in Access. For instance, you might want to create one from scratch that will be used in a database you are creating in the future. When you installed Access, a special program was also installed that allows you to create workgroup information files. This is called, oddly enough, the Workgroup Administrator program. To run the program, follow these steps:
- Exit Access completely.
- Locate the file wrkgadm.exe on your hard drive. You may need to use the Find feature of Windows to locate the file.
- Run the program. Figure 16-19 shows what the program interface looks like.
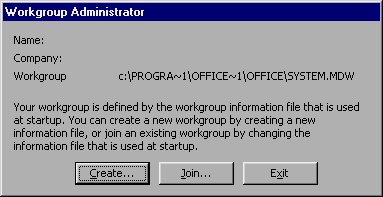
Figure 16-19 Creating a workgroup information file from scratch.
To create your new workgroup information file, click your mouse on the Create button. Workgroup Administrator asks you for three pieces of information:
- Name. Your name.
- Organization. Your company name.
- Workgroup ID. This is the WID discussed earlier in the chapter. This can be any unique string, between 4 and 20 characters in length. You need to take care that you remember what WID you assign to a particular workgroup information file, as it is needed to do some administrative tasks. It is your knowledge of what the WID is that identifies you as an authorized person to perform some tasks.
When you have supplied all this information, click your mouse on the OK button. Workgroup Administrator asks you to specify where the file should be created and under what name. You can indicate any location desired, although the Workgroup Administrator suggests the location of the other workgroup information files on your system. When you click your mouse on the OK button, Workgroup Administrator displays the information you entered (see Figure 16-20) and asks you to confirm it.
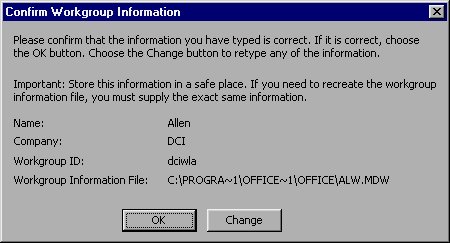
Figure 16-20 Confirming your workgroup information file specifications.
When you click your mouse on the OK button, Workgroup Administrator creates the requested workgroup information file and informs you it is done. When you are done with the program, simply click your mouse on the Exit button.
Adding an Account
You can add an account to a database that has been secured relatively easily, provided you logged on to the database using an administrator account. All you need to then do is choose Security from the Tools menu and then choose User and Group Accounts from the resulting submenu. Access displays the User and Group Accounts dialog box, as shown in Figure 16-21.
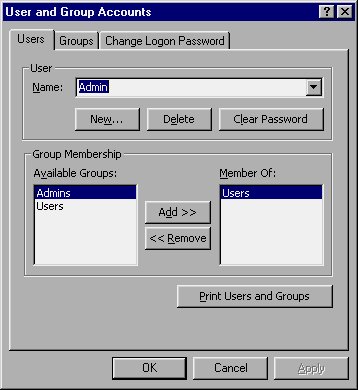
Figure 16-21 The User and Group Accounts dialog box.
To add a new account, click your mouse on the New button. Access displays the New User/Group dialog box, which asks for two pieces of information:
- Name. The name of the new user account you are adding.
- Personal ID. This is a unique identification string, between 4 and 20 characters in length. It serves to internally identify the account to Access.
When you have supplied the information, click your mouse on the OK button. Access adds the user account, as directed.
Adding a new group account is very similar. All you need to do is click your mouse on the Groups tab in the User and Group Accounts dialog box (Figure 16-21), and then click on the New button. The same two pieces of information are requested for new group accounts as are requested for new user accounts. Supply the information and click your mouse on OK to add the account.
Removing an Account
To remove an existing user account, you start from the same User and Group Accounts dialog box shown in Figure 16-21. Using the pull-down Name list, select the account you want to delete. Then click your mouse on the Delete button. Access asks you to confirm your deletion. When you click your mouse on the Yes button, the account is removed.
The only difference in removing a group account is that you must first click your mouse on the Groups tab. Otherwise, all the steps are the same.
Changing Account Permissions
As you learned earlier in this chapter, you can assign permissions to specific objects to either individual users (explicit permissions) or to groups (implicit permissions for the users in that group). To change permissions, all you need to do is log an as an administrator and choose the Security option from the Tools menu. On the resulting submenu, choose User and Group Permissions. Access displays the User and Group Permissions dialog box, as shown in Figure 16-22.
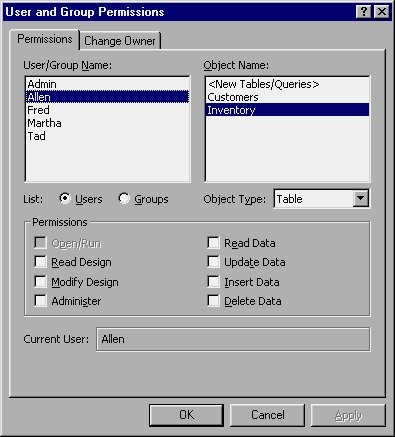
Figure 16-22 The User and Group Permissions dialog box.
If you want to specify explicit permissions for an individual user, all you need to do is select the user in the left side of the dialog box and the desired object in the right side. Then you can modify the permissions at the bottom of the dialog box.
If you instead want to work with implicit permissions, click your mouse on the Groups option button in the middle of the dialog box. Then, the left side lists the groups you have defined. Pick a group, pick an object, and set the permissions at the bottom of the dialog box.
Changes in permissions take effect immediately after you click your mouse on the OK button.
Printing a Security Overview
After you make any major changes in the security configuration for a database, you will want to print out a list of users and groups. All you need to then do is choose Security from the Tools menu and then choose User and Group Accounts from the resulting submenu. Access displays the User and Group Accounts dialog box, as shown earlier in Figure 16-21. You can then click your mouse on the Print Users and Groups button. Access responds by displaying the Print Security dialog box, as shown in Figure 16-23.
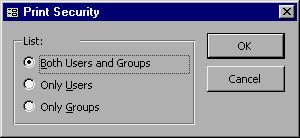
Figure 16-23 The Print Security dialog box.
All you need to do is specify whether you want to print a report on users, groups, or both. When you have made your selection, click your mouse on OK. Access prints the requested report directly to your default printer. (It is interesting that Access doesn't first display the report in a print preview window, as it does with all other reports.)
The report produced by Access shows a list of users with the names of the groups to which they are assigned. It then lists the names of the groups, along with all the users for that group. Unfortunately, the report does not show what permissions each user has. For that information, you are strictly limited to working on-screen.
Learn Access Now! Chapter 15 Previous Section in Chapter 16 Next Section in Chapter 16 Chapter 17