Learn Access Now! Chapter 17 Previous Section in Chapter 18 Next Section in Chapter 18 Chapter 19
Chapter 18: Creating and Using Macros
(This is section 2 of 6 in this chapter)
Creating Macros
Before you start to create a macro, you should have a firm idea of the task you want to accomplish; you may even want to write the steps down or create an outline. Thus, the general steps in creating a macro are as follows:
- Identify the task you want to accomplish.
- Plan the steps you must perform to manually accomplish that task.
- Create the macro code necessary to implement the steps.
- Test the macro code.
- Refine your macro code.
- Repeat steps 4 and 5 until the macro works correctly.
As you work with macro actions, you will notice that most of them require arguments. Arguments are nothing more than values that affect how an action is carried out. Since actions most often mimic the menu commands you select manually, think of arguments as the settings you specify within the dialog boxes the menu commands display.
You create macros by using the Macro window, which is described in the following section.
Understanding the Macro Window
The Macro window is where you tell Access the actions you want the macro to perform. To access the Macro window, you simply select the Macros button in the Database window and then click your mouse on the New button. As you can see from Figure 18-1, the Macro window is similar to the other Access Design windows. The Macro window includes two columns; in the left column, you specify the action you want done, and, in the right column, you include a comment that explains this particular macro step.
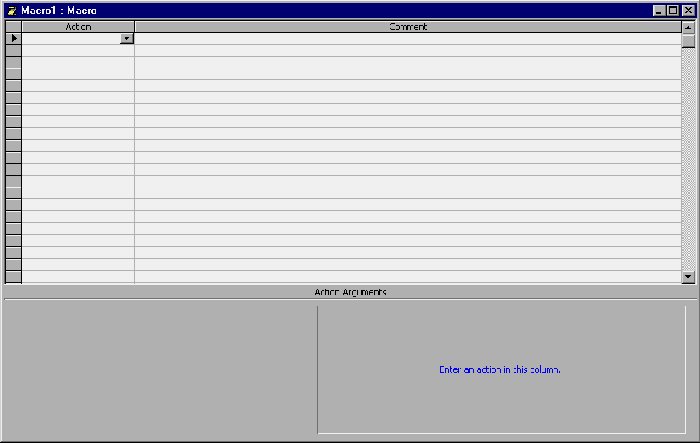
Figure 18-1 The Macro window.
Picking the actions you want the macro to perform is as easy as choosing them from a drop-down list. Simply click your mouse on the arrow at the right side of any action cell, and Access will display the available macro actions. After you have selected an action, you can modify the action's arguments. The arguments appear at the bottom of the Macro window, similar to properties in other Design windows. For instance, Figure 18-2 shows the arguments for the OpenForm action.

Figure 18-2 Arguments for the OpenForm action.
Once you understand actions and arguments, you can use the Macro window like any other Design window in Access. You can add information, manipulate it, and save it using the same commands. For instance, you can add rows to the macro window using the Rows option from the Insert menu. Conversely, you can delete rows by using the Delete Rows option from the Edit menu. In this case, when you add or delete a row, you actually add or delete an Access action.
A Macro to Automate Adding Records
Note: This rest of this chapter uses the My Friends.mdb database you used in several chapters of this book. If you do not have a copy handy, you may want to use the Friends 3.mdb database located on the companion CD-ROM. You should copy the file to a directory on your hard drive and rename it My Friends.mdb.
As an example of how you can use a macro, assume you have a large number of records in the My Friends table. When you use your data entry form, you may find it a nuisance to go through the steps necessary in order to get to where you can add a new record. To get around this, you can develop a macro that will automatically open the form and take you to the end of the table.
Since you've already decided exactly what you want to do, your next step is to decide how the macro will do it. Examining the task, you figure out you want to:
- Turn off screen updating (the changing screens are distracting)
- Open the Review Friends form
- Jump to the last record
- Turn on screen updating
To begin, display the Macro window. The first action you will use is Echo. The Echo action lets you control whether Access displays what your macro is doing (shows the screen updates). Normally, when a macro action occurs that affects the screen, Access updates the screen right away. In addition to being distracting, screen updates can slow macros down since you must wait for Access to update the screen after each step. The Echo action lets you turn screen updating off. In this way, Access won't update the screen until you later turn screen updating back on.
To begin, select the first row in the Action column of the Macro window. Click your mouse on the pull-down arrow at the right side of the column, and you will see the list of available actions, as shown in Figure 18-3.
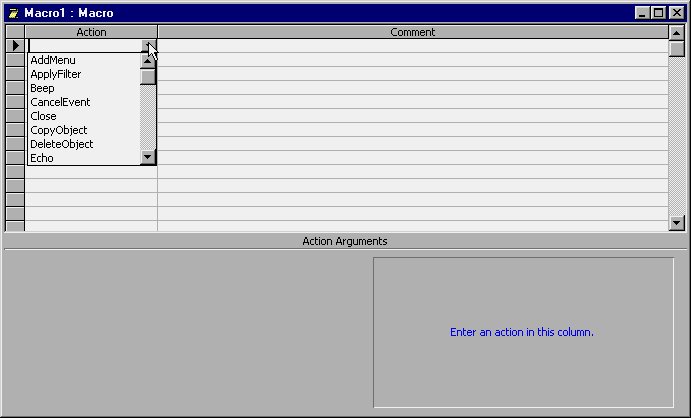
Figure 18-3 Selecting an action for your macro.
Scroll through the list until you find the Echo action. When you click your mouse on the action, the list disappears and Access displays the Echo action in the Macro window. Notice, also, that Access displays the arguments for the Echo action at the bottom of the Macro window. There are only two arguments for Echo; the first one lets you indicate if Echo is on, and the second lets you display some information for the status line. To turn off screen updates, set the first argument to No. The second argument--the Status Bar Text argument--may take a bit of explaining.
If you leave the screen updates off, someone using the macro may wrongly believe that their computer has hung. After all, when Access is busy executing your macro, it will not respond to the user. One way you relieve user anxiety is to display a message letting them know what is going on. You use the Status Bar Text argument to display, in the status bar, a message that informs the user that a macro is executing. With that in mind, type the text Preparing information; one moment please... When you are done, the Macro window should appear as shown in Figure 18-4.
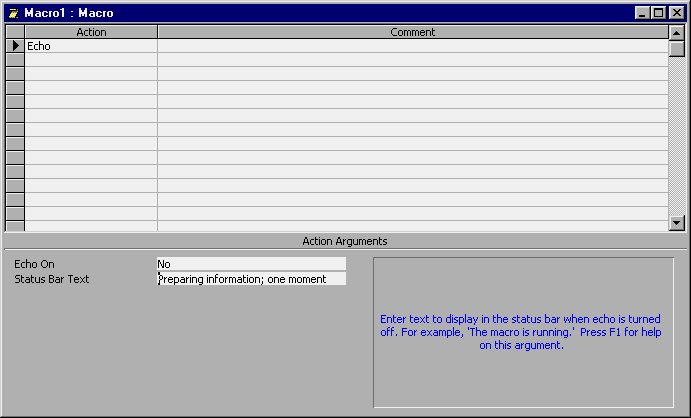
Figure 18-4 The first step of your macro is complete.
At this point, you may also want to add a special feature for those who use your macro and have slow computers. For the next macro action, you can make Access change the mouse pointer from the regular arrow to an hourglass. The hourglass is a universal Windows symbol that indicates something is going on and the user should wait. You can do this with the Access Hourglass action. Select the next empty row (the second one) in the Action column. Again, click your mouse on the pull-down arrow and select the Hourglass action. Notice that this action has only one argument--one that controls whether Access displays the hourglass or not. When the argument is set to Yes (as it is by default), Access displays the hourglass. Set the Hourglass action's argument to Yes and move on to your third macro action.
In the next step, you want Access to open the form you use to input information in the My Friends table. To open the form, you use the OpenForm action. Move to the third row in the Action column and select the OpenForm action. As you can see in Figure 18-5, the OpenForm action has quite a few arguments.
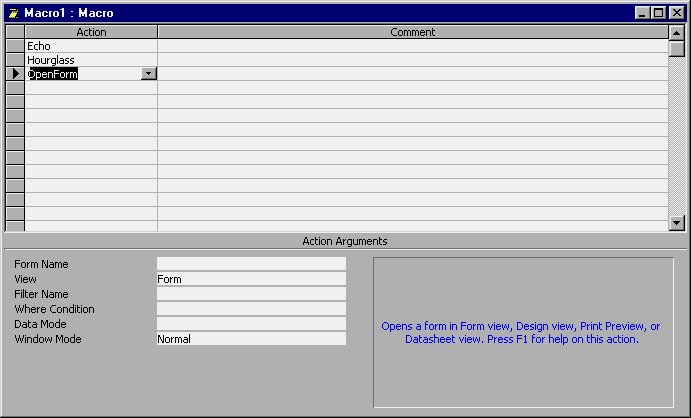
Figure 18-5 Arguments for the OpenForm action.
At a minimum, you need to fill in the Form Name argument, which tells Access the form you want to open. When you select this argument, notice that Access displays a pull-down arrow at the right side of the argument box. If you click your mouse on this arrow, you can select one of the forms defined in the database. Select the Review Friends form.
There are other arguments available for the OpenForm option, as follows:
- View. This argument defaults to the Form view, exactly as it should be (you want to display the form). You can change this argument to other modes, such as Datasheet, Design, or Print Preview.
- Filter Name. You can apply a saved query or filter to the information the form displays. Since you are only going to be adding information, simply leave this argument blank.
- Where Condition. Another way you can filter the information available in the form is to use an SQL Where clause. You can use these clauses to select records in much the same way as you would use a filter. Again, leave this blank.
- Data Mode. Here you specify one of three choices: Add, Edit or Read Only. Add allows you to add records using the form. Edit lets you change information in the form and add records, and Read Only lets you view but not change the records. While you can select either Add or Edit mode to allow the addition of records (the purpose of the macro in the first place), it is best to pick Edit in this instance, since it gives you the most versatility.
- Window Mode. Controls how Access displays the window. Your choices are Normal, Hidden, Icon, and Dialog. Normal (the default) displays the window as designed by the form designer. Hidden removes the window from view. Icon minimizes the window to the size of an icon. Dialog makes the window pop up as a dialog box.
You can set all of these, if you wish, but there is really no need to do so, other than the Data Mode argument. Once done, you are ready to move to the next step. In the fourth row of the Action column, you need to select an action that will let you enter a new record. To do so, select the GoToRecord action. Access, in turn, will list four arguments in the Macro window. You need to set only one of these arguments (Record).
Normally, the Record argument is set to Next, which means Access selects the next record. There are other options available for this argument, however:
- Previous. Selects the previous record.
- Next. Selects the following record.
- First. Selects the first record in the table.
- Last. Selects the last record in the table.
- Go To. Lets you specify a record you want selected.
- New. Lets you enter a new record.
The final option (New) is the one which will accomplish your goal of letting the user enter a brand new record. Make the change to the argument, and your macro is essentially complete. There are still a few "clean up" steps which you will want to include, however. For instance, you need to redisplay the screen updates (using the Echo action) and change the mouse pointer back to normal (using the Hourglass action). Go ahead and add these actions, in this order. Your completed macro should now look like what you see in Figure 18-6.
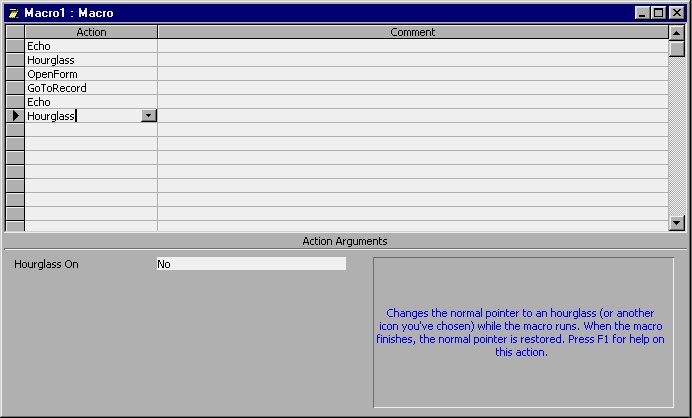
Figure 18-6 The completed macro.
Saving Your Macro
Now that the macro is complete, go ahead and close the macro window. Access, in turn, will ask if you want to save your macro. Select Yes, and Access displays the Save As dialog box (Figure 18-7) to allow you to name the new macro.
[Insert HOA1807.BMP]Figure 18-7 Naming the macro.
Use a descriptive macro name, such as Add New Record. When you press ENTER or click your mouse on the OK button, Access saves the macro and updates the Database window. At this point your macro is ready for use.
A Special Macro
The name you provide for your macro is important. Besides providing a descriptive name, you can also use the special name AutoExec. If you do, Access will automatically run the macro every time you start Access. You use an automatic macro when you want to do any of the following:
Automatically configure Access for use
Automatically run a special program tied into the macro
Automatically load a project you are working on
If you don't want the AutoExec macro to run when you start Access, simply hold down the SHIFT key when you start the program.
Learn Access Now! Chapter 17 Previous Section in Chapter 18 Next Section in Chapter 18 Chapter 19