Learn Access Now! Chapter 17 Previous Section in Chapter 18 Next Section in Chapter 18 Chapter 19
Chapter 18: Creating and Using Macros
(This is section 3 of 6 in this chapter)
Conditional Macros
When Access runs a simple macro, Access begins at the macro's first action and performs each action, one after another, in the order the actions appear in the Macro window Action column. As your macros become more complex, you may want them to make decisions, based on specific conditions. For example, if a file does not exist, you may want the macro to end.
You let macros make such decisions by adding conditions to your macros. These conditions determine when certain macro actions run. For example, assume you want to create a macro to automatically generate a report of the records in the My Friends table. You created a report to do this in Chapter 8, "Creating Simple Reports," so all you need to do is make a simple macro that will run the report. The condition you will check now is whether there are any records in the table to print. If there are no records, you will want to exit the macro without printing anything. With this in mind, the steps for your macro would be:
- Check to see if records exist. If no records exist, stop the macro.
- Turn off screen updating
- Print the report
- Turn on screen updating
To begin, display the Macro window. Notice that there are only two columns, Action and Comment. To add conditional statements to your macro, you need to add a third column. To do so, click your mouse on the Conditions tool (to the left of the Insert Rows tool) or choose the Conditions option from the View menu. Access changes the Macro window to look like that shown in Figure 18-8.
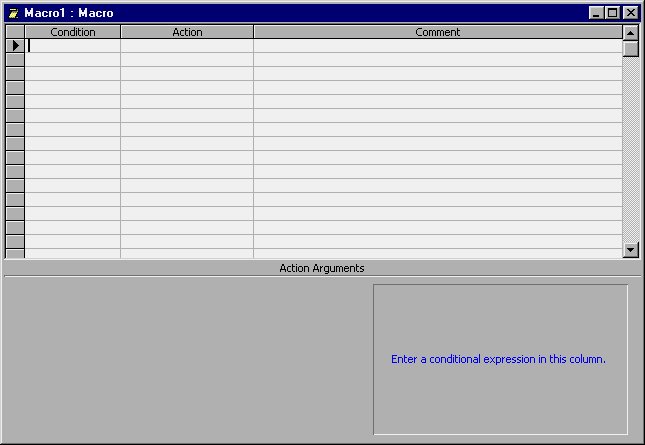
Figure 18-8 Access displays the Condition column.
In the Condition column, you specify expressions that tell Access when it should execute the actions you specify in the Action column. For a review on Access expressions, turn to Chapter 3, "Taking a Closer Look." Condition expressions are the same as those you use in validation rules, filtering, and sorting.
For the first step of this macro, you will want Access to determine if there are any records to print. You do this using the DCount function in the macro. The DCount function determines the number of records that meet a specific criteria. When you use DCount in the following conditional statement, DCount returns the number of records in the entire table:
DCount("*","My Friends") = 0
Enter this condition in the first row of the Condition column. If the count of records in the My Friends table is equal to 0, the condition is True, and Access will execute the action on that row. As you'll recall, if there are no records in the table, you want the macro to end. To end the macro, you can use the Stop Macro action. Type in StopMacro in the Action column. At this point, your Macro window should look like that shown in Figure 18-9. (Notice that there are no arguments for the StopMacro action; it simply stops the macro.)
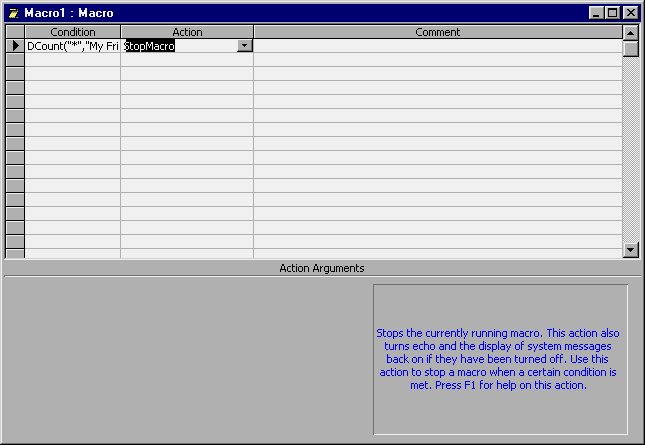
Figure 18-9 The conditional and its action have been entered.
You can now enter the rest of the macro's actions. You already know how to enter the actions that turn off the screen updating (the Echo action) and change the mouse pointer to an hourglass (the Hourglass action); you used these actions in the previous macro. When you are done entering these two actions, you should be ready to enter the fourth action--the one that will print the report.
To print a report, use the OpenReport action. In the fourth row of the Action column, select this action; your Macro window will appear as shown in Figure 18-10.
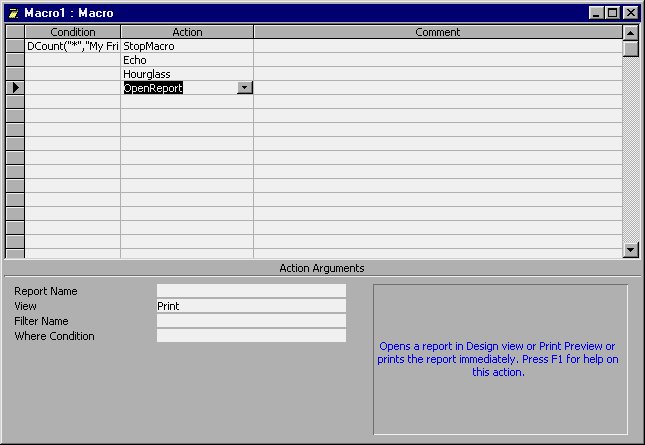
Figure 18-10 After entering the fourth macro step.
There are two arguments for the OpenReport action which you must set. The first, Report Name, is where you identify the name of the report you want to use. If you select this argument, you can click your mouse on the pull-down arrow at the right of the argument box. When you do, you can select from the reports you have defined in your database. Select the My Friends, Alphabetic List report (this is the only one you have defined).
The View argument lets you indicate how you want Access to handle the report. If you click your mouse on the pull-down arrow for this argument, you can see that there are three options:
- Print. Prints the report immediately. This is the default setting for the View argument.
- Design. Displays the Design window for the report.
- Print Preview. Shows the report in print preview, after which the user can print, if desired.
In this case, the default option (Print) should be selected. This argument causes Access to immediately print the report. The other two arguments for the OpenReport action are Filter Name and Where Condition; these arguments serve the same purpose as they did when you used the OpenForm option earlier in the chapter. For this macro, you can leave both of these arguments blank.
When Access finishes printing the report, Access leaves the Report open on the screen. The user won't know this, of course, since the macro has turned the screen updating off. But you will want to close the report so Access won't display it when the macro turns the screen updating back on. To close the report you use the Close action. Select this action in the fifth row.
The Close action, by default, closes the object currently active. You can, however, specify that it close another object by using the three arguments available with the Close action. You should always be as specific as possible when you design a macro. As such, set the arguments to specify the object you want closed (the report). To do this, select the first argument, Object Type, and then click your mouse on the pull-down arrow to its right. You will see a list of different types of objects in the database. Select the Report object and then move on to the next argument.
The Object Name argument lets you specify which particular object you want closed. Again, click your mouse on the pull-down arrow and you will see a list of the Report objects available in the database. Choose the My Friends, Alphabetic List report.
The Save argument allows you to specify whether Access should save the object when it is closed. This is an important argument, if either your macro changed the object or you allowed the user to change it. In the case of this macro, however, there are no changes. Thus, you can change the Save argument to No. Your Macro window should now look like what you see in Figure 18-11.
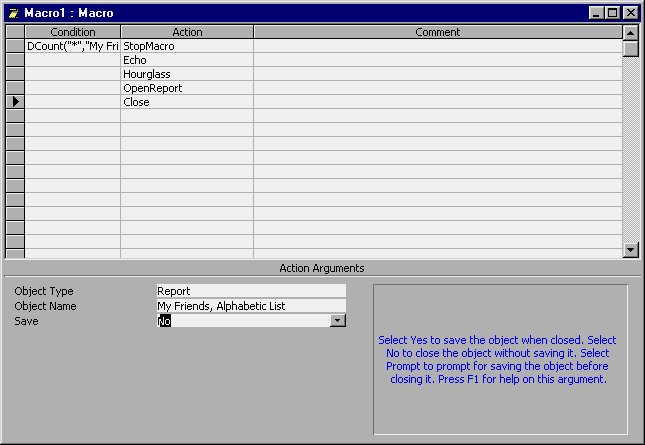
Figure 18-11 After closing the report.
Your macro now contains the actions to print and close the report. Now you need to turn on screen updating and to change the mouse pointer back to normal. Your macro performs these steps using the same actions as earlier (Echo and Hourglass). Add these two actions to your macro now. Your Macro window should appear as shown in Figure 18-12.

Figure 18-12 The completed macro.
You have now completed your first macro that uses a conditional argument. All you need to do now is save it. Again, to save you macro, close the Macro window and provide a macro name. In this case, use a name such as Print Report. Access will then return you to your updated Database window.
Learn Access Now! Chapter 17 Previous Section in Chapter 18 Next Section in Chapter 18 Chapter 19